Blog

  • phosphorusfive-dox

    Phosphorus Five, the guide

    Welcome to the “book” about Phosphorus Five. Phosphorus Five, also referred to as P5 in this guide, is a lot of different things. It is a simple design pattern, it is an Ajax library, it is a programming language, and it is a framework. Some would also argue that it is a web operating system. What you choose to refer to it as, is really quite irrelevant. The point is that it solves your problems, particularly the ones you’re having, as you try to create rich and interactive web apps. This book aims at being your “one stop guide”, as you start out with P5. A beginner’s introduction. Starting out at the “for dummies level”, and hopefully moving you onwards to the expert level.
    To see an introduction video of Phosphorus Five – Please watch the following YouTube video.

    Chapters

    Appendix

    The objectives of the book

    During this book, you will learn everything you need to know to create your first Phosphorus Five application – From the first line of code, to deployment in a production environment. My aim is to bring you up to this knowledge in P5, in roughly 2 days. That way, the book becomes very practical, and hands on, progressing rapidly, and you can feel that you have done something constructive fast. We will start out with creating smaller systems, such as simple CRUD apps, and finish up with creating a complete application.

    Every construct we go through, will have a practical application for you. The book is a hands on guide, intended to ignite your own creative processes. As we create these practical solutions, we will also discuss the software architecture theory behind our choices. After reading this book, you can consider yourself a senior software architect, easily capable of discussing software architecture, with some of the best architects on the planet.

    Prerequisites for reading

    This book assumes some basic knowledge about HTML, but does not require you to know JavaScript and/or C# from before. However, some basic knowledge of JavaScript and C#, might be beneficial, since we will dive into these technologies in some of the chapters. You can still perfectly take advantage of it, even if you have never created as much as a single line of code in neither JavaScript, C#, nor any other programming languages. This book does not assume you’re a programmer from before, although it sometimes helps having done some programming earlier. Some basic CSS knowledge is also beneficial, however not required.

    Technologies visited

    The main programming language in P5 is called “Hyperlambda”, and will be the programming language used for almost all of our examples. Even if you have no interest in learning Hyperlambda, the book will still be valuable for you, since it is also a guide to software architecture theory in general. In addition, Hyperlambda is easily extended through C#, so a C# developer will also benefit from reading this book.

    We will also touch upon HTML, CSS, and some general programming theory throughout this book. However, most of the book, is dedicated to hands on, practical examples, of actual useful applications, you could probably benefit from having access to, regardless of whether or not you read the book or not.

    A guide to the guide

    The book’s convention, is created carefully to allow you to understand what is being described. First of all, any property or attribute from Hyperlambda is referenced like [this], where “this” assumes a node’s name. This convention is used whenever a node is referenced inline in the text. Emphasized and important points, are written like this.

    Inline code is written like this and multiple lines of code is written like the following illustrates.

    howdy-world
      this-is:A piece of Hyperlambda code!
    

    How to read the book

    Advanced topics, which are not necessary to understand in order to proceed, are explicitly marked as such. You will often find a link close to where a topic has been marked as advanced, allowing you to easily skip the advanced parts. Often the advanced topics of P5, is given inline to preserve context. This means, that advanced topics, are equally easily found in the beginning of the book, as they are found at the end of the book.

    You can easily skip these advanced topics in your first read, for later to refer to them as the need surfaces. This ensures that the book is not only a beginner’s guide, but also of use for the “Shaolin Ninja P5 master developer”.

    In general, there are 2 different ways of reading this book. There is the “beginner’s guide”, which doesn’t require you do read any of the advanced chapters. This allows you to rapidly get up to speed in your understanding of P5 and software architecture design principles. This type of reading can probably be done in a day or two, following simple copy and paste examples. These examples are intended to demonstrate some idea, while also incorporating some important software architecture design principle – In addition to being hands on useful examples, of problems you would highly likely to need a solution for in your own applications. This allows you to gain terrain very rapidly, as you read the book – While also understanding the underlaying theory for our choices.

    Then there’s the “master’s read through”, which is intended for a second reading of the book. This reading will give you a more detailed vision of both P5, and software architecture design principles in general. This way of reading the book expects you to read the “advanced topics”.

    If this is your first encounter with P5, I would encourage you to skip all the “advanced chapters”, to get you up to speed as fast as possible. This type of reading actually expects you to start out your reading at chapter 2. This “track”, is created to rapidly make you gain ground, while staying in the flow, with highly applicable and useful examples, intended to leave you with something real and tangible result – In addition to teaching you some very specific and useful concepts.

    Sometimes, the book will also include links to YouTube videos, which you can watch, to further increase your understanding of some concept. These are created as additions to the chapters, and often we analyze the code we looked at in the chapters where these videos are included.

    Where is the reference documentation?

    The reference documentation for P5, depending upon which component you are interested in, can be found at the following links.

    • p5.config – Accessing your app’s configuration settings
    • p5.data – A super fast memory based database
    • p5.events – Creating custom Active Events from Hyperlambda
    • p5.hyperlambda – The Hyperlambda parser
    • p5.io – File input and output, in addition to folder management
    • p5.lambda – The core “keywords” in P5
    • p5.math – Math Active Events
    • p5.strings – String manipulation in P5
    • p5.types – The types supported by P5
    • p5.web – Everything related to web (Ajax widgets among other things)
    • p5.auth – User and role management
    • p5.crypto – Some of the cryptography features of P5, other parts of the cryptography features can be found in p5.mime and p5.io.zip
    • p5.csv – Handling CSV files in P5
    • p5.flickr – Searching for images on Flickr
    • p5.html – Parsing and creating HTML in P5
    • p5.http – HTTP REST support in P5
    • p5.imaging – Managing and manipulating images from P5
    • p5.authorization – Authorization features in P5
    • p5.io.zip – Zip’ing and unzip’ing files, also supports AES cryptography
    • p5.mail – Complex and rich SMTP and POP3 support, which is far better than the internal .Net classes for accomplishing the same
    • p5.mime – MIME support, in addition to PGP, and handling your GnuPG database
    • p5.mysql – MySQL data adapter
    • p5.threading – Threading support in P5
    • p5.xml – XML support in P5

    In addition the core parts of P5 is documented here

    Introduction to the introduction

    This might sound weird, but the book’s introduction can actually be found in chapter 8. My reasoning for doing this, is that I want you to have some hands on experience with P5, before we introduce it from a conceptual point of view. I have therefor chosen to wait with the introduction of the book, until you’re almost midway through the book.

    Downloading the book

    Periodically, I might create a download of the book, which you can read locally. This will be in the formats offered by GitHub, such as .zip and .tar.gz. These downloads are the “raw source” of the book, which is in Markdown format. It could probably be beneficial for you to use a Markdown viewer, to read the book. I personally use “MacDown” for writing the book.

    This way of distributing the book, allows you to create inline comments as you read it, providing answers for exercises, and comments etc. It also allows you to easily create patches and additions to the book. In addition, it makes it easy for you to document your own systems as additions to this book, having a great foundation for the documentation of your own systems. Which means that as you start out creating value on top of P5, you can start documenting your own system, from the point where the book ends. Hence, there might, and should, exist a “gazillion” versions of this book out there, where every version of the book, is equally unique as the system it is describing.

    My email address is thomas@gaiasoul.com, and you can find the book’s main source at GitHub, which is the place where I prefer you to submit feedback about the book, if you have any.

    Version

    The current version you are reading, was created around the same time as Phosphorus Five version 5.0 was released. The book might be updated, as changes occurs in Phosphorus Five, and new releases are being created. The book’s current version itself is 5.0. However, the book will inevitably change as P5 changes.

    License and copyright

    The book is licensed under the terms of the GPL, version 3, and copyright Thomas Hansen, thomas@gaiasoul.com, 2017.

    Sharing is caring

    Visit original content creator repository
    https://github.com/polterguy/phosphorusfive-dox

  • read-paf

    readpaf

    Build PyPI

    readpaf is a fast parser for minimap2 PAF (Pairwise mApping Format) files. It is written in pure python with no required dependencies unless a pandas DataFrame is required.

    Installation

    Minimal install:

    pip install readpaf

    With optional pandas dependency:

    pip install readpaf[pandas]
    Direct download As readpaf is a self contained module it can be installed by downloading just the module. The latest version is available from:
    https://raw.githubusercontent.com/alexomics/read-paf/main/readpaf.py
    

    or a specific version can be downloaded from a release/tag like so:

    https://raw.githubusercontent.com/alexomics/read-paf/v0.0.5/readpaf.py

    PyPI is the recommended install method.

    Usage

    readpaf only has one user function, parse_paf that accepts of file-like object; this is any object in python that has a file-oriented API (sys.stdin, stdout from subprocess, io.StringIO, open files from gzip or open).

    The following script demonstrates how minimap2 output can be piped into readpaf

    from readpaf import parse_paf
    from sys import stdin
    
    for record in parse_paf(stdin):
        print(record.query_name, record.target_name)

    readpaf can also generate a pandas DataFrame:

    from readpaf import parse_paf
    
    with open("test.paf", "r") as handle:
        df = parse_paf(handle, dataframe=True)

    Functions

    readpaf has a single user function

    parse_paf

    parse_paf(file_like=file_handle, fields=list, na_values=list, na_rep=numeric, dataframe=bool)

    Parameters:

    • file_like: A file like object, such as sys.stdin, a file handle from open or io.StringIO objects
    • fields: A list of 13 field names to use for the PAF file, default:
      "query_name", "query_length", "query_start", "query_end", "strand",
      "target_name", "target_length", "target_start", "target_end",
      "residue_matches", "alignment_block_length", "mapping_quality", "tags"
      These are based on the PAF specification.
    • na_values: A list of values to interpret as NaN. This is only applied to numeric fields, default: ["*"]
    • na_rep: Value to use when a NaN value specified in na_values is found. This should ideally be 0 to match minimap2’s output default: 0
    • dataframe: bool, if True, return a pandas.DataFrame with the tags expanded into separate Series

    If used as an iterator, then each object returned is a named tuple representing a single line in the PAF file. Each named tuple has field names as specified by the fields parameter. The SAM-like tags are converted into their specified types and stored in a dictionary with the tag name as the key and the value a named tuple with fields name, type, and value. When print or str are called on PAF record (named tuple) a formated PAF string is returned, which is useful for writing records to a file. The PAF record also has a method blast_identity which calculates the blast identity for that record.

    If used to generate a pandas DataFrame, then each row represents a line in the PAF file and the SAM-like tags are expanded into individual series.

    Visit original content creator repository https://github.com/alexomics/read-paf
  • Website-all-attacks-for-penetration

    🚀 From Solo Learner to Team Leader: My Cybersecurity Journey 🚀

    Welcome to the repository documenting my cybersecurity journey, achievements, and resources! This project is a reflection of my passion for making the digital world safer, from my early days of solo learning to building a dedicated team and launching my own cybersecurity services platform.

    🌟 About

    Four years ago, I embarked on a mission to explore the world of cybersecurity. Over the years, I honed my skills, embraced the thrill of bug bounties, and collaborated with like-minded professionals to secure platforms and contribute to a safer digital ecosystem. Today, I proudly introduce my cybersecurity services website, a hub for solutions and knowledge sharing.

    Check it out here: musayyabshah.com

    🔑 Key Features

    • Professional Cybersecurity Services
      Comprehensive solutions tailored to meet the unique security needs of businesses and individuals.

    • Educational Blogs & Resources
      Actionable insights and strategies for navigating the ever-evolving cybersecurity landscape.

    • Knowledge Sharing & Awareness
      Empowering businesses and individuals with the tools to enhance their digital safety.
    💡 Mission Statement

    This project and website represent a step toward creating awareness, fostering innovation, and empowering the global community to navigate cybersecurity with confidence.
    📞 Contact

    For collaborations, inquiries, or discussions, feel free to connect with me:

    🙌 Gratitude

    A big thank you to my mentors, teammates, and supporters who’ve been an integral part of this journey. Your encouragement and collaboration have made this possible.


    Together, let’s build a safer digital future! 🌐💻🛡️

    Visit original content creator repository
    https://github.com/Musayyab-Shah/Website-all-attacks-for-penetration

  • MDX-LabPanel

    MDX LabPanel

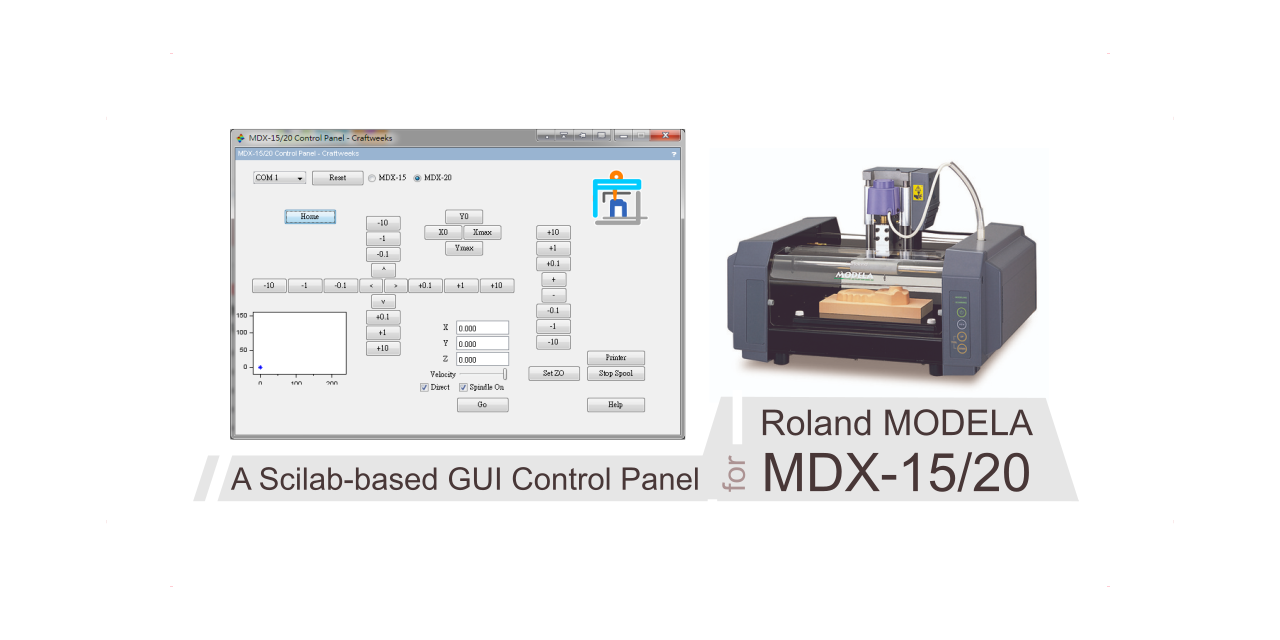
    Scilab-Programmed GUI Control Panel for Roland MODELA MDX-15/20 CNC Machine For Windows

    cover_image

    ko-fi

    Usage

    A custom control panel developed for Roland MODELA MDX-15/20 desktop CNC milling machine.

    • GUI buttons and indicators for manipulating the tool position of this 3-axis CNC milling machine
    • Enables to input the ZO value (custom zero position for z-axis) accurately
      • Instead of leveling the tool with your eyes and UP and DOWN buttons on the machine
      • Useful for resuming interrupted machining processes with exact the same ZO setting, no matter the machine has been powered off or reset accidentally
    • Quick access of Printer Queue and Start/Stop Printer Spooler

    #Screenshot

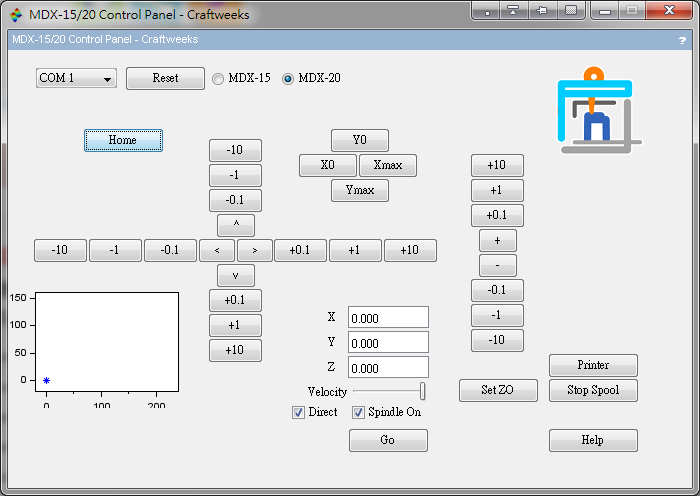
    Screenshot of version 0.4
    v0.4

    Prerequisite

    • Scilab 5.5 or above (recommended, also compatible with Scilab 6.0 for v0.4 or later)

    What is Scilab ? Scilab is free and open source software for numerical computation providing a powerful computing environment for engineering and scientific applications. Official Site of Scilab (http://www.scilab.org/)

    • MDX-15/20 is connected with port COM1 (also COM2 or COM3 for v0.3 or later)

    How To Install

    1. If you do not install Scilab, please install it on the computer
    2. Download the Zip file of our repository, and then extract the files

    How To Use

    1. Launch Scilab
    2. Choose File > Execute, and then select main.sce (v0.4 or later) in the file selection dialog
      • Execute ControlPanel.sce for v0.3
    3. Press Reset to zero out z-axis
    4. Press Home to zero out x- and y-axes

    YouTube:

    Please visit and subscribe our YouTube channel [Craftweeks Creative Space]

    Version History

    v0.4 2017-6-4

    • Enabled the setting for MDX-15
    • Added Spindle on/off
    • Added Feed rate control
    • Added graphical display for indicating tool position
    • Integrated Reset to the first Home operation
    • Optimized the code for X0, XMAX, Y0, YMAX homing
    • Fixed the wrong direction of the Y0 and YMAX homing buttons
    • Fixed the filepath issue
    • Fixed the compatibility with Scilab 6.0.0 or later

    Screenshot of version 0.4

    v0.3 2017-4-8

    • Enable to choose the COM port for the machine
    • One click to open Print Queue by pressing Printer
    • Start/Stop Windows Printer Spooler service by pressing Start/Stop Spool
    • Added Help button that link to our webpage
    • Changed background color and button style

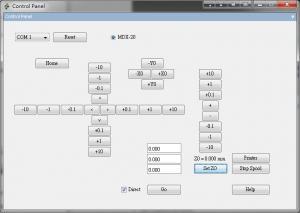
    Screenshot of version 0.3

    v0.2 2017-1-6

    • Enable to move to a target position at once, by toggling Direct Go
    • Added buttons for homing +X, -X, +Y and -Y position

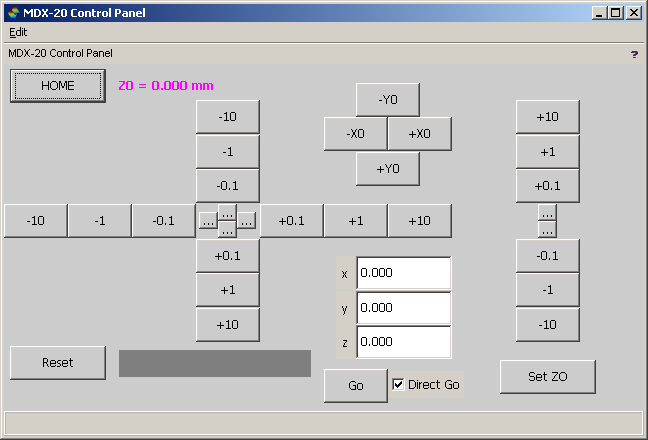
    Screenshot of version 0.2

    v0.1 2016-12-23 (The version shown in the introduction video in YouTube)

    • Move instantly after press a direction button
    • Set custom Z0 level

    Give me a little help

    ko-fi

    Copyright and License

    Logo of Craftweeks - Hong Kong

    Copyright 2016 – 2019, Chris KY FUNG and the contributors in Craftweeks – CNC group

    License GNU AFFERO GENERAL PUBLIC LICENSE Version 3 (GNU AGPLv3)

    Visit original content creator repository https://github.com/craftweeks/MDX-LabPanel
  • alexa-skill-test

    Alexa Skill Test

    Alexa Skill Test provides a live server for local testing of Alexa Skills written in Node.js. Right now, testing skills usually involves going through the Amazon Alexa Developer Portal. This project makes testing much easier.

    Requirements

    • Node/npm
    • An Amazon Alexa Skill written in Node.js

    Install

    It’s recommended to install Alexa Skill Test as a global npm package:

    npm install -g alexa-skill-test

    After install, the alexa-skill-test command will be available to you.

    Command

    Alexa Skill Test works off one command:

    alexa-skill-test [--path] [--interaction-model]

    --path let’s you optionally specify a relative path to your skill. --interaction-model let’s you optionally specify a relative path to your interaction model.

    Usage

    Within your terminal, change directory to your valid Amazon skill. Your skill will need a package.json and a main script file. Run the following command:

    alexa-skill-test

    This starts up a local testing server using your Alexa skill. If you specify a relative path to an interaction model using --interaction-model, the app will prefill your skill intents for you.

    In your browser, navigate to http://localhost:3000. You should see a simple UI for sending test requests to your skill.

    Note:

    In the skill(s) you’re testing, you should set your appId like so:

    if ('undefined' === typeof process.env.DEBUG) {
      alexa.appId = '...';
    }

    Setting an appId while debugging will cause Lambda to throw an error since there will be a mismatch. Alexa Skill Test will automatically set the DEBUG environmental variable.

    License

    MIT

    Visit original content creator repository
    https://github.com/tlovett1/alexa-skill-test

  • activity-streams

    @yuforium/activity-streams

    Activity Streams Validator and Transformer

    Getting Started

    npm i --save \
      @yuforium/activity-streams \
      class-validator class-transformer \
      reflect-metadata

    Using Built-In Classes

    Use built in classes to do validation using class-validator:

    import 'reflect-metadata';
    import { Note } from '@yuforium/activity-streams';
    import { validate } from 'class-validator';
    
    const note = new Note();
    
    async function validateNote() {
      let errors = await validate(note);
    
      if (errors.length > 0) {
        console.log('the note is invalid');
      }
      else {
        console.log('the note is valid');
      }
    }
    
    note.id = 'https://yuforium.com/users/chris/note-123';
    
    validateNote(); // the note is valid
    
    note.id = 'invalid, id must be a valid URL';
    
    validateNote(); // the note is invalid

    Defining Custom Validation Rules

    You can define your own validation rules by extending the built in classes or initializing your own using one of several methods using a base type (such as a link, object, activity, or collection):

    import { Expose } from 'class-transformer';
    import { IsString, validate } from 'class-validator';
    import { ActivityStreams } from '@yuforium/activity-streams';
    import 'reflect-metadata';
    
    
    // Creates a CustomNote type class as an Activity Streams Object
    class CustomNote extends ActivityStreams.object('CustomNote') {
      @Expose()
      @IsString({each: true})
      public customField: string | string[];
    };
    
    // Add this to the built-in transformer
    ActivityStreams.transformer.add(CustomNote);
    
    // new instance of CustomNote
    const custom: CustomNote = ActivityStreams.transform({
      type: 'CustomNote',
      customField: 5 // invalid, must be a string
    });
    
    // will get error "each value in customField must be a string"
    validate(custom).then(errors => {
      errors.forEach(error => { console.log(error) });
    });

    Composite Transformation

    In addition to supporting custom classes, multiple types may be defined and interpolated from the transform() method.

    import { Expose } from 'class-transformer';
    import { IsString, validate } from 'class-validator';
    import { ActivityStreams } from '@yuforium/activity-streams';
    import 'reflect-metadata';
    
    
    // Creates CustomNote class as an Activity Streams Object
    class CustomNote extends ActivityStreams.object('CustomNote') {
      @Expose()
      @IsString({each: true})
      public customField: string | string[];
    };
    
    // Add this to the built in transformer
    ActivityStreams.transformer.add(CustomNote);
    
    // new instance of CustomNote
    const custom = ActivityStreams.transform({
      type: 'CustomNote',
      customField: 5 // invalid, must be a string
    });
    
    // will get error "each value in customField must be a string"
    validate(custom).then(errors => {
      errors.forEach(error => { console.log(error) });
    });

    Requiring Optional Fields

    Many fields in the Activity Streams specification are optional, but you may want to make them required your own validation purposes.

    Extend the classes you need and then use the @IsRequired() decorator for these fields.

    my-note.ts

    import { Note, IsRequired } from '@yuforium/activity-streams';
    
    export class MyNote extends Note {
      // content field is now required
      @IsRequired()
      public content;
    }

    validate.ts

    import { MyNote } from './my-note';
    
    const note = new MyNote();
    
    validate(note); // fails
    
    note.content = "If you can dodge a wrench, you can dodge a ball.";
    
    validate(note); // works

    Visit original content creator repository
    https://github.com/yuforium/activity-streams

  • Elements-AI-Game-with-Minimax-Algorithm

    Elements-AI-Game-with-Minimax-Algorithm

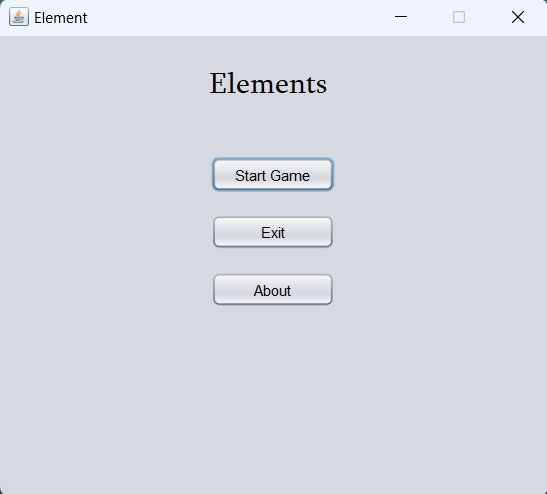
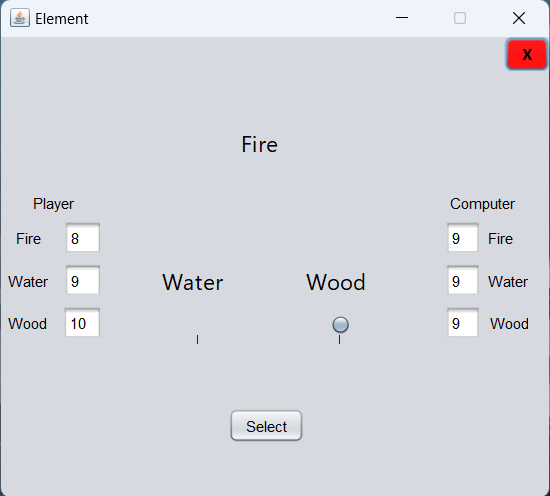
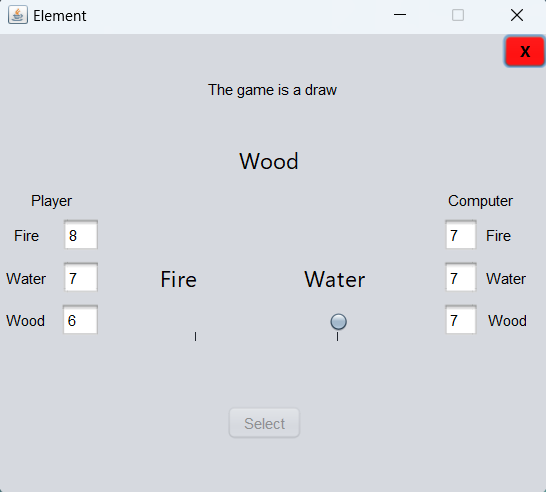
    This is a simple zero sum 2 person game of perfect information. The game consists of 3 elements and each player chooses an available element to counter the displayed element. Depending on the relationship between elements a change of game state is applied. The game terminates as soon as 5 moves are made by each player to reduce the game tree size but the number of moves can be changed by updating an if statement in the action listener for the select element button in the Elements class. The number of elements that each player starts with also can be changed by changing the initial values of variables representing these elements in the Logic class.

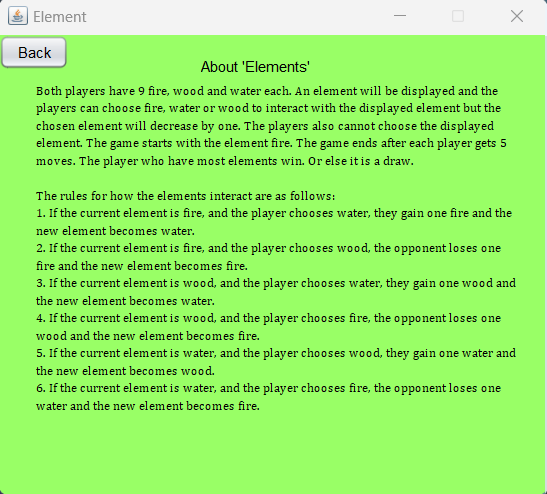
    In the game, there are 3 elements – fire, water and wood. Each player has 9 fire, wood and water each. The player can choose fire, water or wood but the chosen element will decrease by one. The players also cant choose the displayed element. The game starts with fire. If the player chooses water, the player gets one fire and the new element will be water. If the player chooses wood, the opponent looses one fire and the new element will be fire. If the main element is wood, choosing water will get the player gets one wood and the new element will be water. If the player chooses fire, the opponent looses one wood and the new element will be fire. If the main element is water, choosing wood will get the player gets one water and the new element will be wood. If the player chooses fire, the opponent looses one water and the new element will be fire. The game continues each person had 5 turns (or the set number of turns) each. The player with the most elements combined at the end wins.

    The game was developed in Java with the netbeans IDE and requires Java to run.

    Menu Screen

    Menu Screen

    Game Screen

    Game Screen

    End of game screen

    End of game

    About screen

    About screen

    Visit original content creator repository https://github.com/EdenThomas/Elements-AI-Game-with-Minimax-Algorithm
  • byteme

    byteme

    A proc-macro to convert a struct into Vec and back by implemeting From trait on the struct.
    The conversion is Big Endian by default.

    We have made the following assumptions about the the struct:

    • The struct must have fields.
    • The fields are public.
    • The fields have the following types
      • u8
      • u16
      • u32
      • u64
      • u128
      • usize
      • [u8; N]
      • an enum
    • For enum, we must attach a #[byte_me($size)] attribute, where size is any of the positive integer types.
    • The enum declration must have #[derive(FromPrimitive)] from the num-derive crate.

    The num-derive crate is required to generate the FromPrimitive trait for enums. Having said that, the same
    functionality can be achieved using num-enum crate. It provides furthur control over the enum data types,
    and might prove handy. here is the discussion
    on the topic.

    Example

    use byteme::ByteMe;
    pub use num_derive::FromPrimitive;
    
    
    #[derive(Debug, FromPrimitive)]
    pub enum Mode {
      Unavailable = 0,
      Unauthenticated = 1,
      Authenticated = 2,
      Encrypted = 4,
    }
    
    #[derive(ByteMe, Debug)]
    pub struct FrameOne {
      pub unused: [u8; 12],
      #[byte_me(u32)]
      pub mode: Mode,
      pub challenge: [u8; 16],
      pub salt: [u8; 16],
      pub count: u32,
      pub mbz: [u8; 12],
    };
    
    let frame = FrameOne {
      unused: [0; 12],
      mode: Mode::Authenticated,
      challenge: [0; 16],
      salt: [0; 16],
      count: 1024,
      mbz: [0; 12],
    };
    
    let size = FrameOne::SIZE; // Get the number of bytes in the frame
    let bytes: Vec<u8> = frame.into(); // Converts the frame into vector of bytes
    let frame: FrameOne = bytes.into(); // Converts the bytes back to frame

    License: Apache-2.0

    Visit original content creator repository
    https://github.com/breuHQ/byteme

  • alkalarm-alexa-skills

    Alkalarm-alexa-skills

    This is the alexa skill for the alkalarm system project integration.

    The main idea of this project is create an integration using alexa skills and the echo device to control the “alkalarm” home security system.

    Alarm System

    For example, we could manage the alarm system using:

    Alexa, open the alarm system, and activate it, after 30 second

    Alexa, open the alarm system, and activate it just for the perimeter

    Alexa, open the alarm system, and stop it

    Alexa, tell me the alarm system state

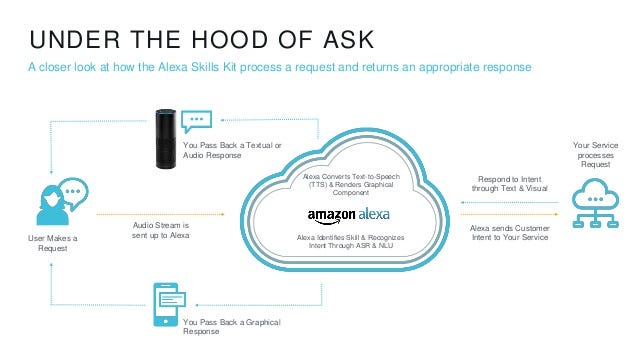
    Alexa Skills Voice Processing Architecture

    Just to keep in mind the steps that we have to do in order to create and integrate custom skills with the alkalarm project, we’re gonna review the main architecture of alexa skills processing:

    Alexa Architecture

    As you can see, we have to define 3 things:

    1-. Create your voice user interface for Alexa skill

    2-. Create the lambda code to response the skills questions integrating that with your service.

    3-. Create the skills definition in AWS Alexa development console.

    1 – Create your voice user interface for alexa skills

    First of all, reading the aws alexa development documentation you could find the voice structure in order to create the skill. It’s important to define a human language to make easy interact with Alexa without forcing the language. In our skill we’re gonna explain in two language (currently english and spanish), but the idea is the same for both of them:

    Voice schema

    The fields are:

    • control word: It’s the main wake up word for alexa devices
    • On Launch: It’s quite rare the first time, but if you’re not developing an special built-in skill, you have to create OnLaunch intent to “open” the skill with alexa. It was the most un-happpy thing that I’ve discovered, but if you define something like “open” make sense for the human language perspective.
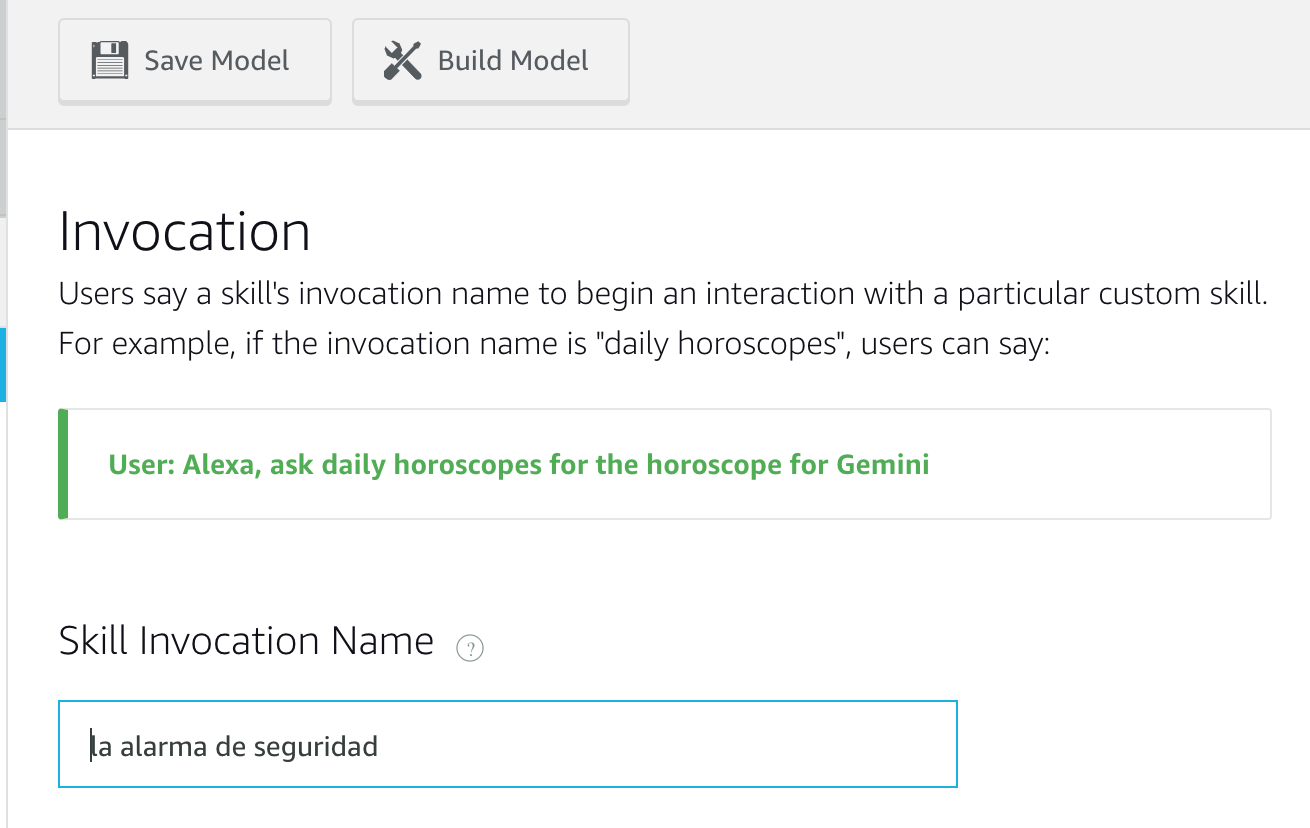
    • Invocation Name: It’s the name which alexa will use to know as the reference to your skill. It’s recommend something that make sense and also with good pronunciation. At this point, the first approach was “alkAlarm”, but doing tests, I discovered that it has a non-natural pronunciation in spanish for alexa. I changed it to “alarm system” which is more easy to understand for alexa.
    • Utterances: That’s the most important part because it’s your own creation to interact with the system. I recommend to create over 10 or more examples with synonymous
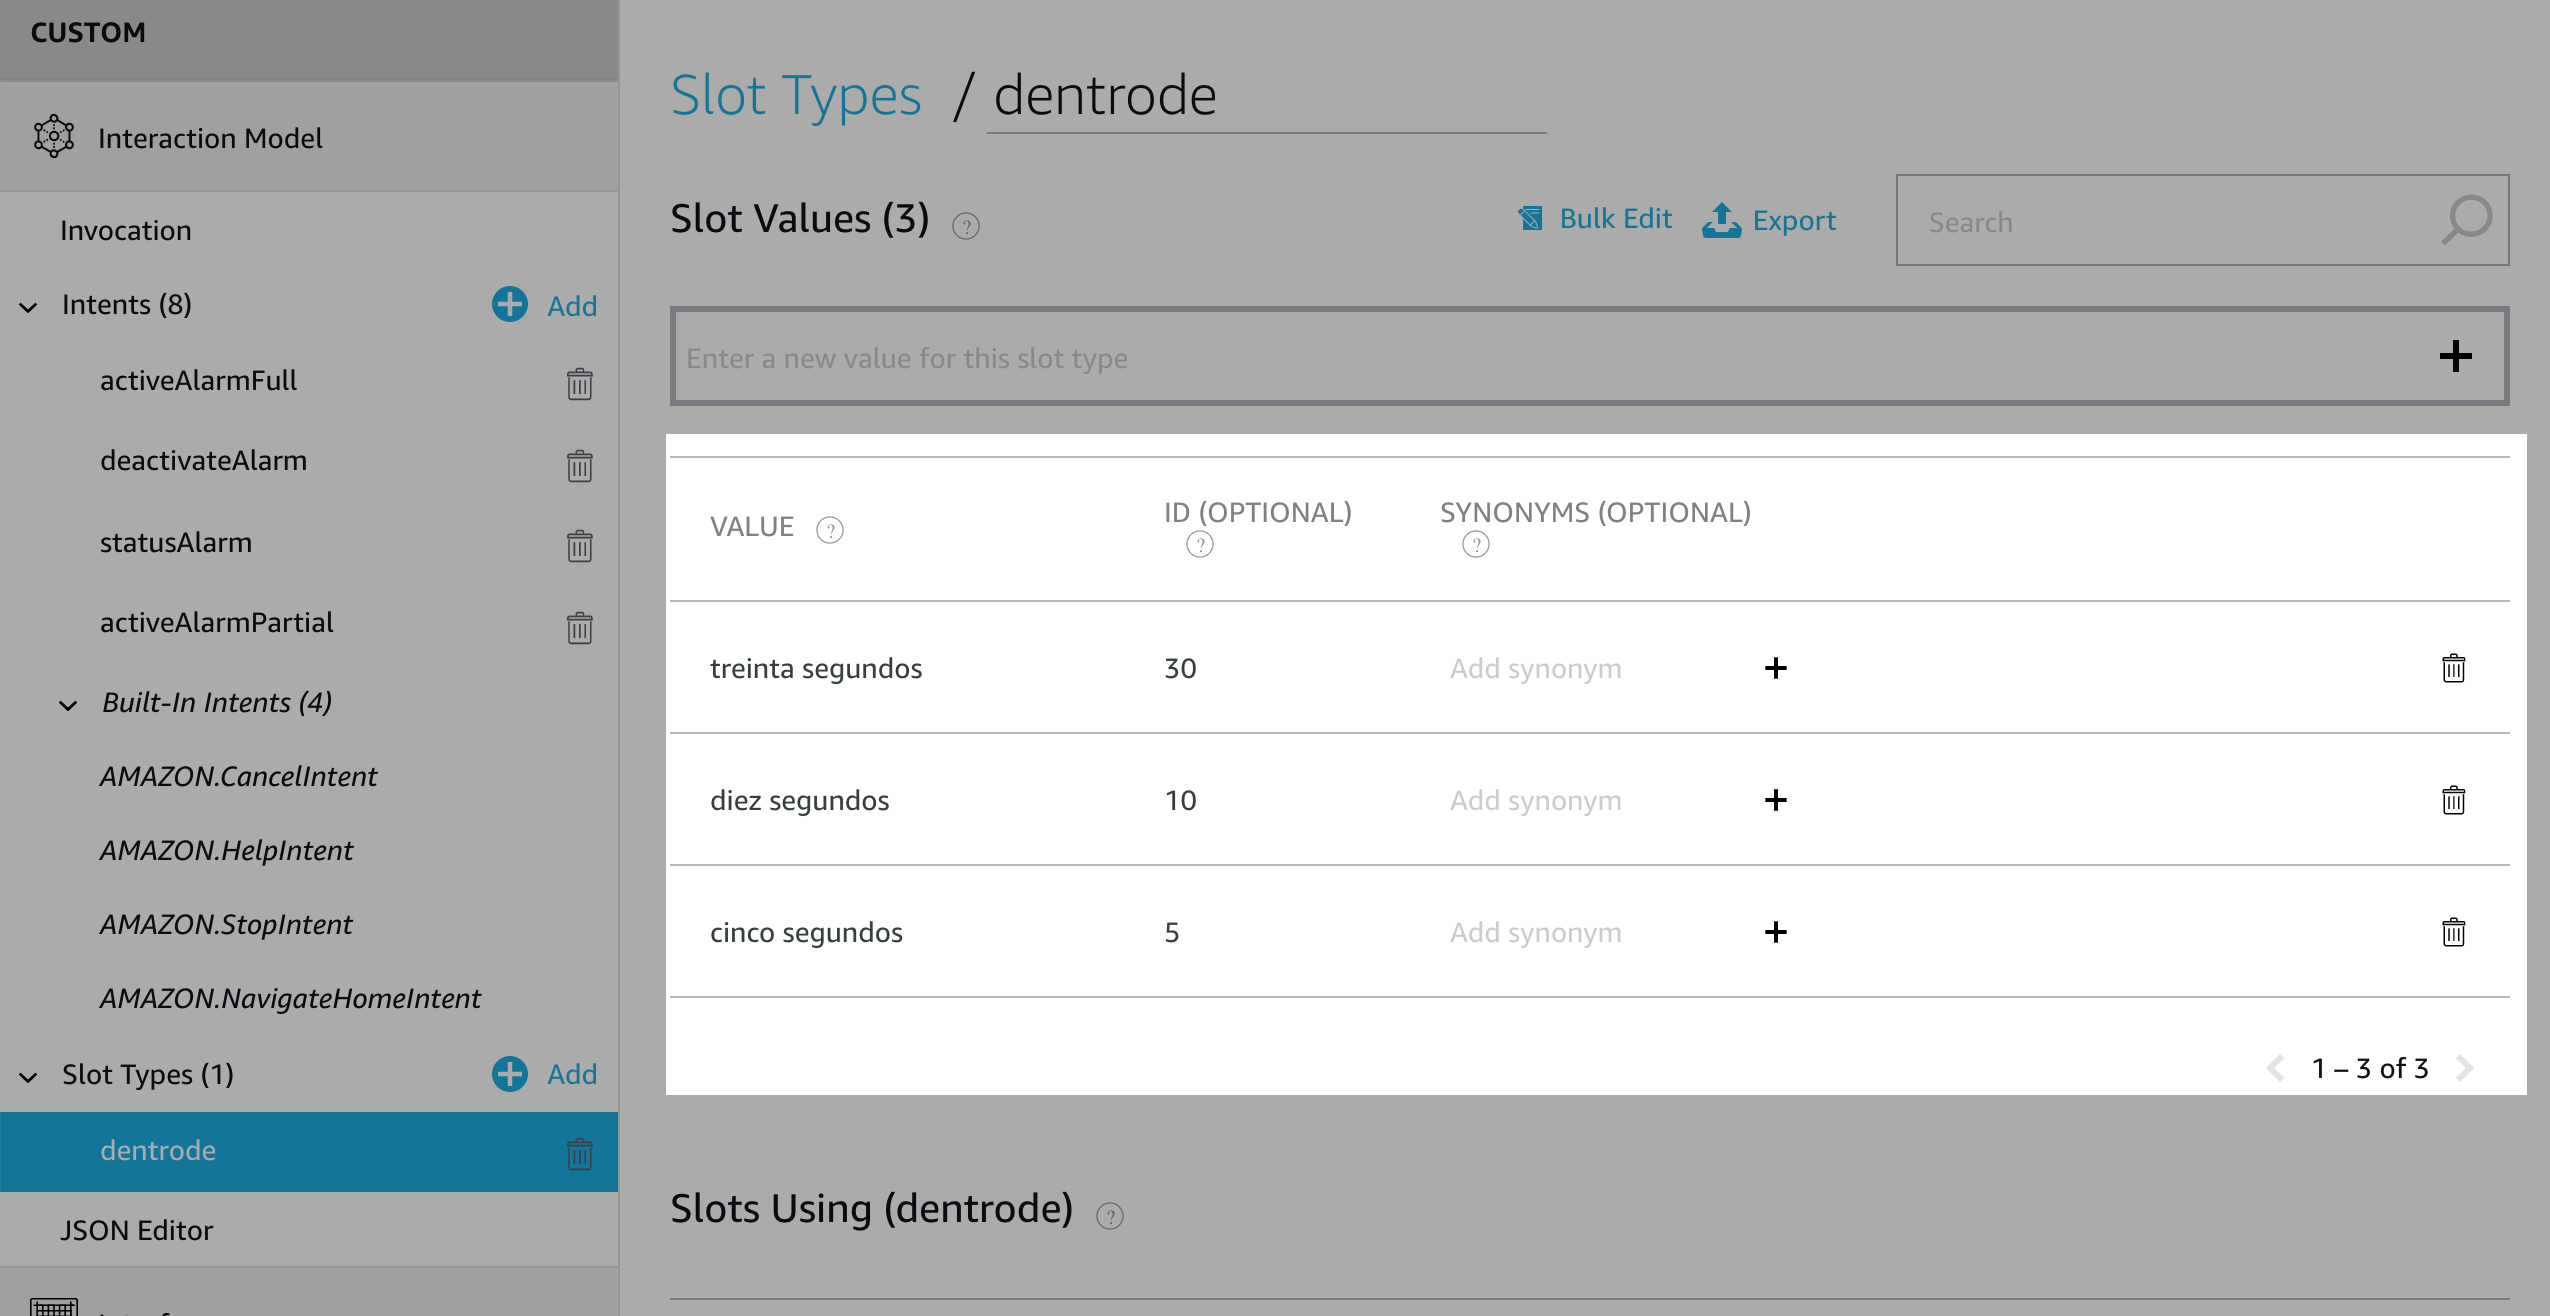
    • Slots: It’s so important if you want to create different behaviours of your system based on time, date, size, and so on.

    2 – Create the lambda code in Golang

    For that phase we’re using the next library (thanks a lot for the contribution to golang community):

    http://github.com/ericdaugherty/alexa-skills-kit-golang

    Using the library we’re able to use all the aws-skills sdk but with golang language:

    From the library, we’ve to implement the next interface functions to adapt to our needs:

    type RequestHandler interface {
    	OnSessionStarted(context.Context, *Request, *Session, *Context, *Response) error
    	OnLaunch(context.Context, *Request, *Session, *Context, *Response) error
    	OnIntent(context.Context, *Request, *Session, *Context, *Response) error
    	OnSessionEnded(context.Context, *Request, *Session, *Context, *Response) error
    }
    

    For the OnSessionStarted function you could create some auth steps before anything happen with alexa. In my case, we don’t have any special task to do

    For the OnLaunch function we’re gonna give the user the welcome to the alarm system. Also, we’re gonna finish the session. It that make sense because in our voice interface definition we decided join all the action in one phrase.

    response.SetStandardCard(cfg.CardTitle, cfg.SpeechOnLaunch, cfg.ImageSmall, cfg.ImageLong)
    	response.SetOutputText(cfg.SpeechOnLaunch)
    	response.SetRepromptSSML(cfg.SpeechOnLaunch)
    
    	response.ShouldSessionEnd = true
    

    For the OnSessionEnded function we don’t have any special information to do with Alexa.

    The OnIntent function will be checked here a little bit later in the same section.

    To do that and with the main idea of organize the code we define the next structure:

    • config/message.go: With the list of messages to the speech function library

      const (
      	SpeechOnLaunch 			= "Bienvenido al sistema de alarma de seguridad"
      	SpeechOnActivateFull 	= "Alarma de Seguridad Activada Completamente. Tienes 30 segundos para salir de casa"
      	SpeechOnActivatePartial = "Alarma de Seguridad Activada solo para el perímetro. Dentro de 30 segundos los detectores de presencia serán desactivados"
      	SpeechOnDeactivate 		= "Alarma de Seguridad Desactivada. Puedes entrar con seguridad en casa"
      	SpeechOnStatusONFull	= "La alarma está activada completamente"
      	SpeechOnStatusONPartial = "La alarma está activada sólo en modo perímetro"
      	SpeechOnStatusOFF 		= "La alarma está desactivada"
      )
      
    • config/config.go: With the app configuration and the alkalarm endpoint config params

      ...
          PathActivateFull 		= "/activate/full"
      	PathActivatePartial 	= "/activate/partial"
      	PathDeactivate			= "/deactivate"
      	PathStatus				= "/status"
      	CardTitle 				= "AlkAlarm Alarma Seguridad" 
      ...
      
    • function/functions.go: Implementation of the interface with the alkalarm endpoints logic

      For example, with the activation, we have to do the request to alkalarm activation api, and then, create the dialog with alexa in the response:

      func ActivateAlarmFull(request *alexa.Request, response *alexa.Response){
      	log.Println("ActiveAlarm Full triggered")
      
      	respNew := doRequest(http.MethodPost, cfg.URL + cfg.PathActivateFull)
      
      	if respNew.StatusCode == http.StatusOK {
      		response.SetStandardCard(cfg.CardTitle, cfg.SpeechOnActivateFull, cfg.ImageSmall, cfg.ImageLong)
      		response.SetOutputText(cfg.SpeechOnActivateFull)
      	}else{
      		response.SetSimpleCard(cfg.CardTitle, "ERROR DOING THE ACTIVATION ALARM")
      		response.SetOutputText("ERROR DOING THE ACTIVATION ALARM ")
      	}
      
      	log.Printf("Set Output speech, value now: %s", response.OutputSpeech.Text)
      }
      

    Obviously, we have to join all the functions into a handler router to know which intent we have to use. This is the most important phase in order to create an effective interaction with alexa:

    func (h *AlkAlarm) OnIntent(context context.Context, request *alexa.Request, session *alexa.Session, aContext *alexa.Context, response *alexa.Response) error {
    	log.Printf("OnIntent requestId=%s, sessionId=%s, intent=%s", request.RequestID, session.SessionID, request.Intent.Name)
    
    	switch request.Intent.Name {
    	case cfg.ActiveFullIntent:
    		f.ActivateAlarmFull(request,response)
    	case cfg.ActivePartialIntent:
    		f.ActivateAlarmPartial(request,response)
    	case cfg.DeactiveIntent:
    		f.DeactivateAlarm(request,response)
    	case cfg.StatusIntent:
    		f.StatusAlarm(request,response)
    	default:
    		return errors.New("Invalid Intent")
    	}
    
    	return nil
    }
    

    Now, the last step is to upload the code to lambda aws service. To do that, we use an example code using the makefile. The important part of the makefile is the way to build, create the lambda file and upload to aws service:

    ROLE_ARN=`aws iam get-role --role-name lambda_basic_execution --query 'Role.Arn' --output text`
    
    all: build pack
    
    build:
    	@GOARCH=amd64 GOOS=linux go build -o $(HANDLER)
    
    pack:
    	@zip $(PACKAGE).zip $(HANDLER)
    
    clean:
    	@rm -rf $(HANDLER) $(PACKAGE).zip
    
    create:
    	@aws lambda create-function                                                  \
    	  --function-name AlkAlarmAlexa                                                 \
    	  --zip-file fileb://handler.zip                                             \
    	  --role $(ROLE_ARN)                                                         \
    	  --runtime go1.x                                                       \
    	  --handler handler


    3 – Create the Skill in AWS Alexa development console

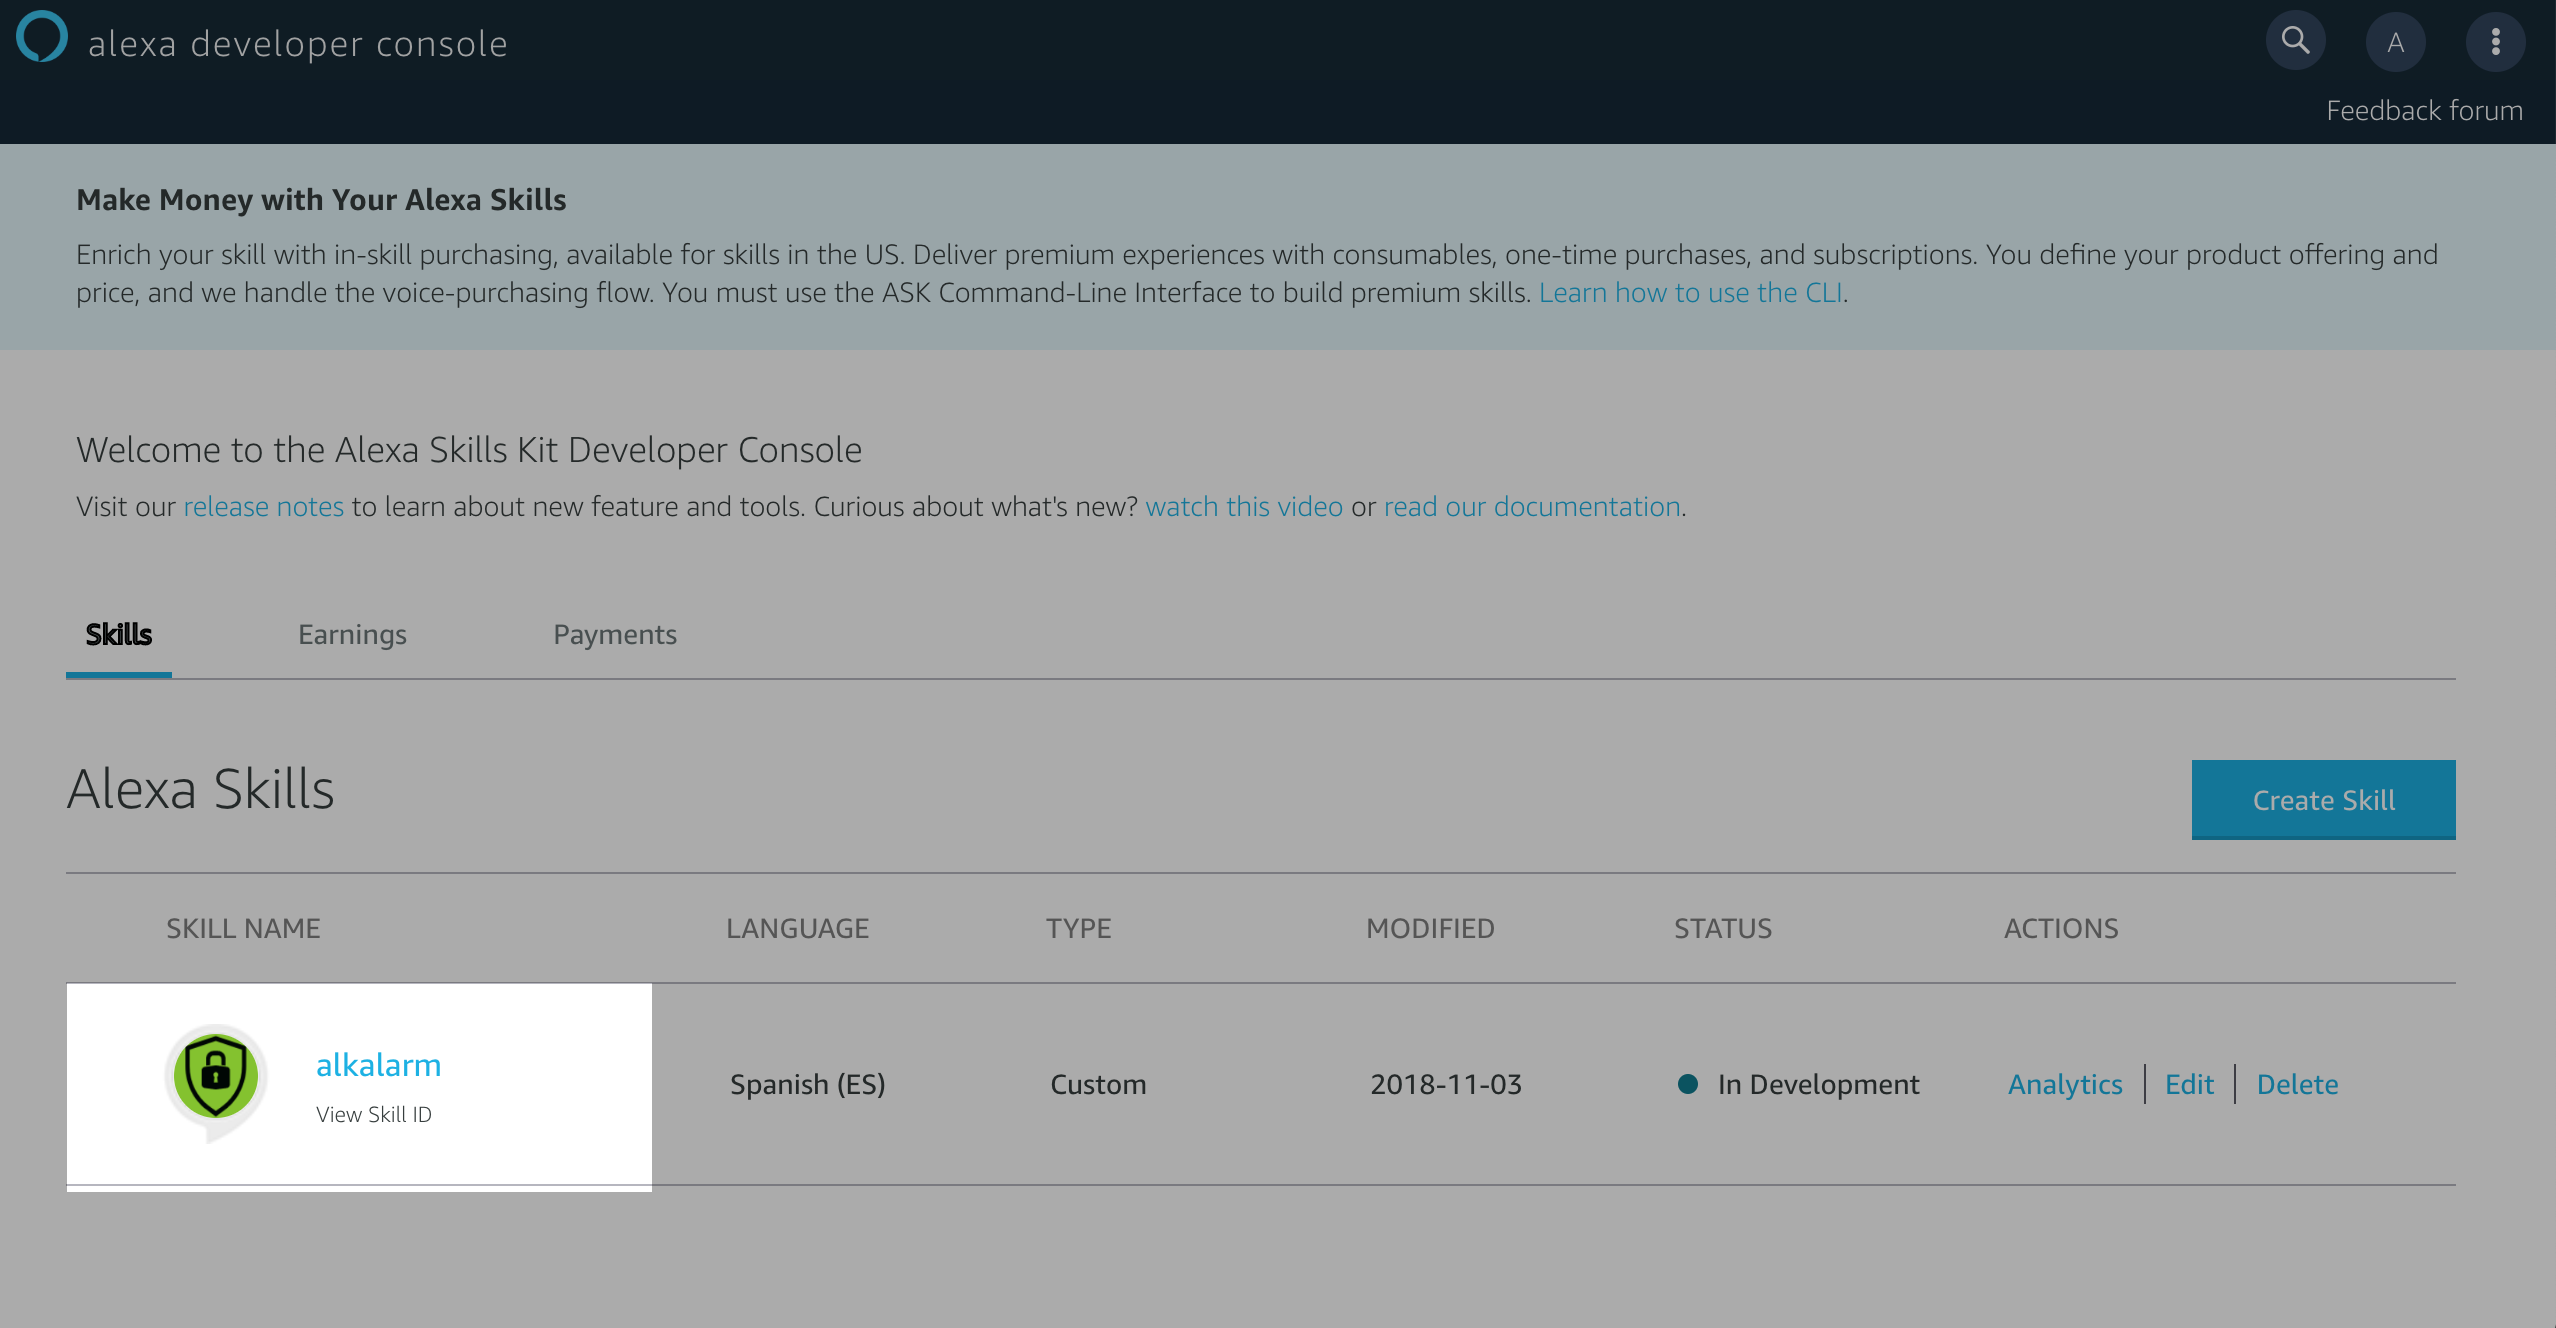
    The first thing that you have to do is create an account in Alexa development console (it’s totally free):

    After the first point, you could create a new skill: dev1

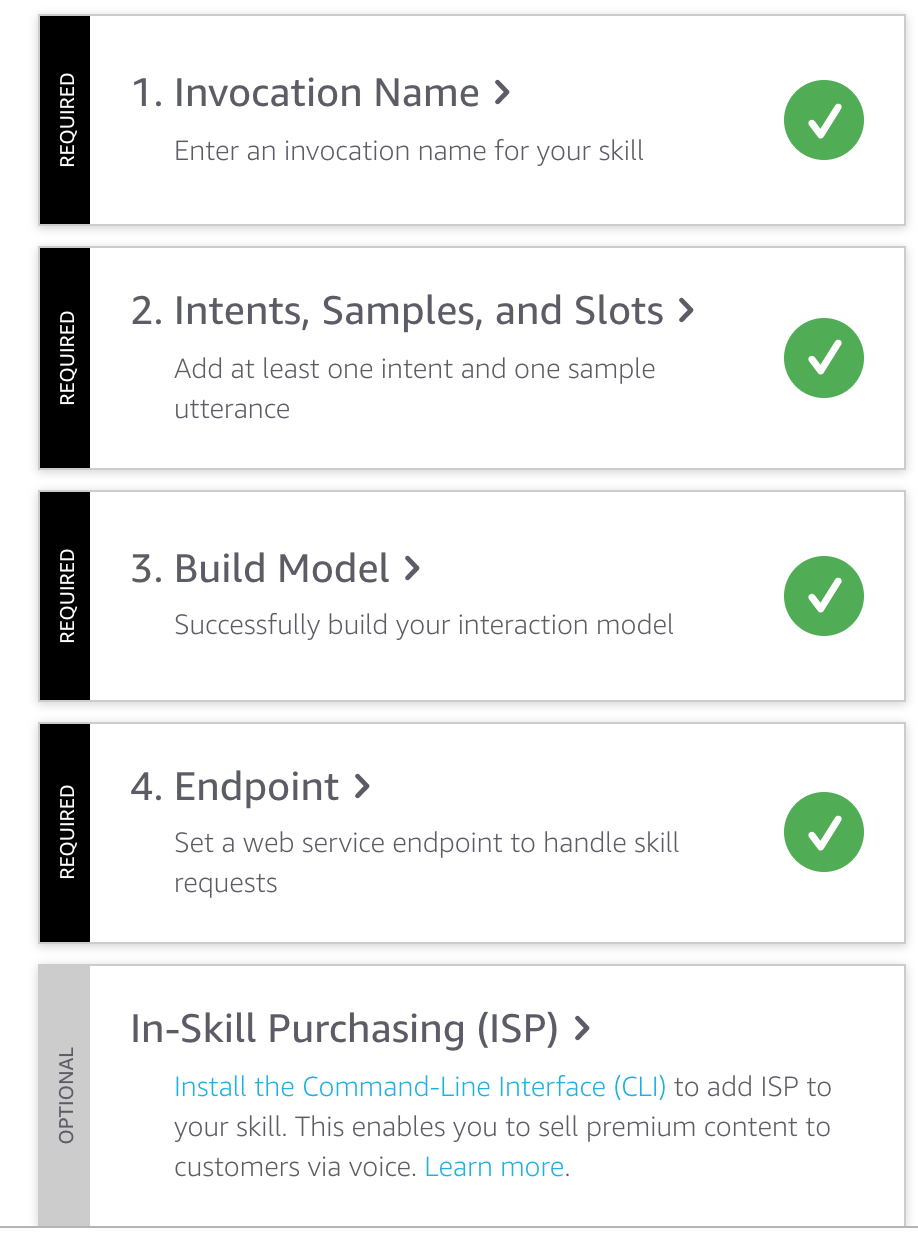
    The first point is create the next elements:

    dev2

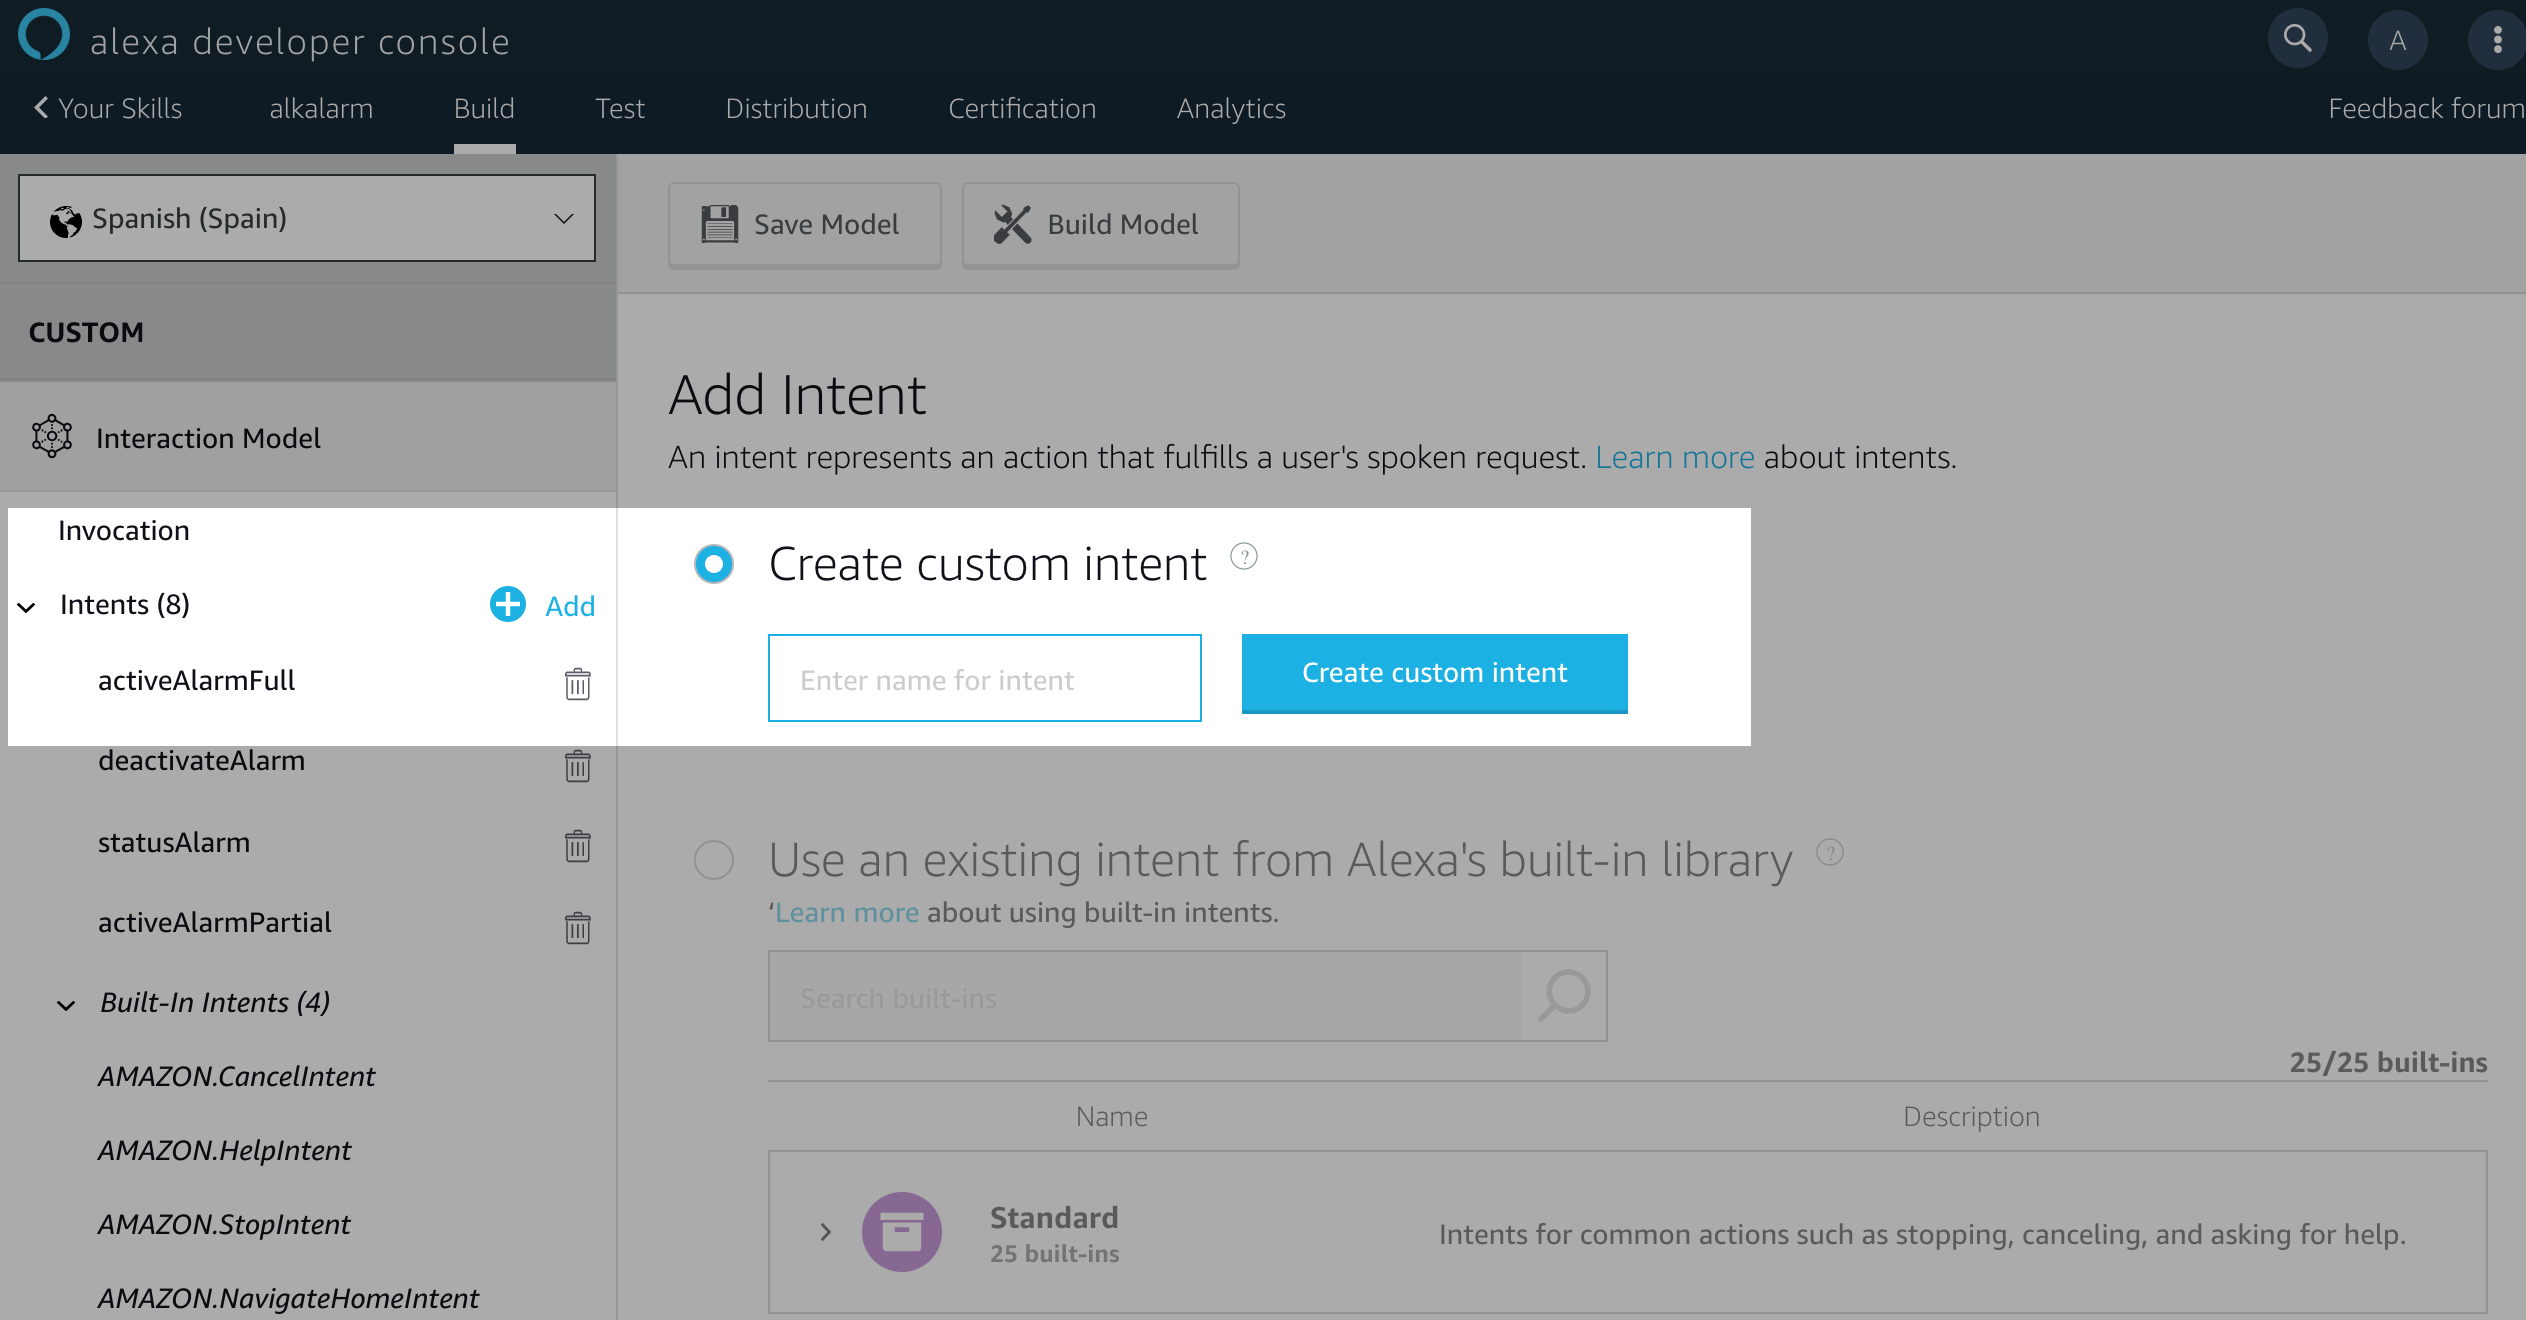
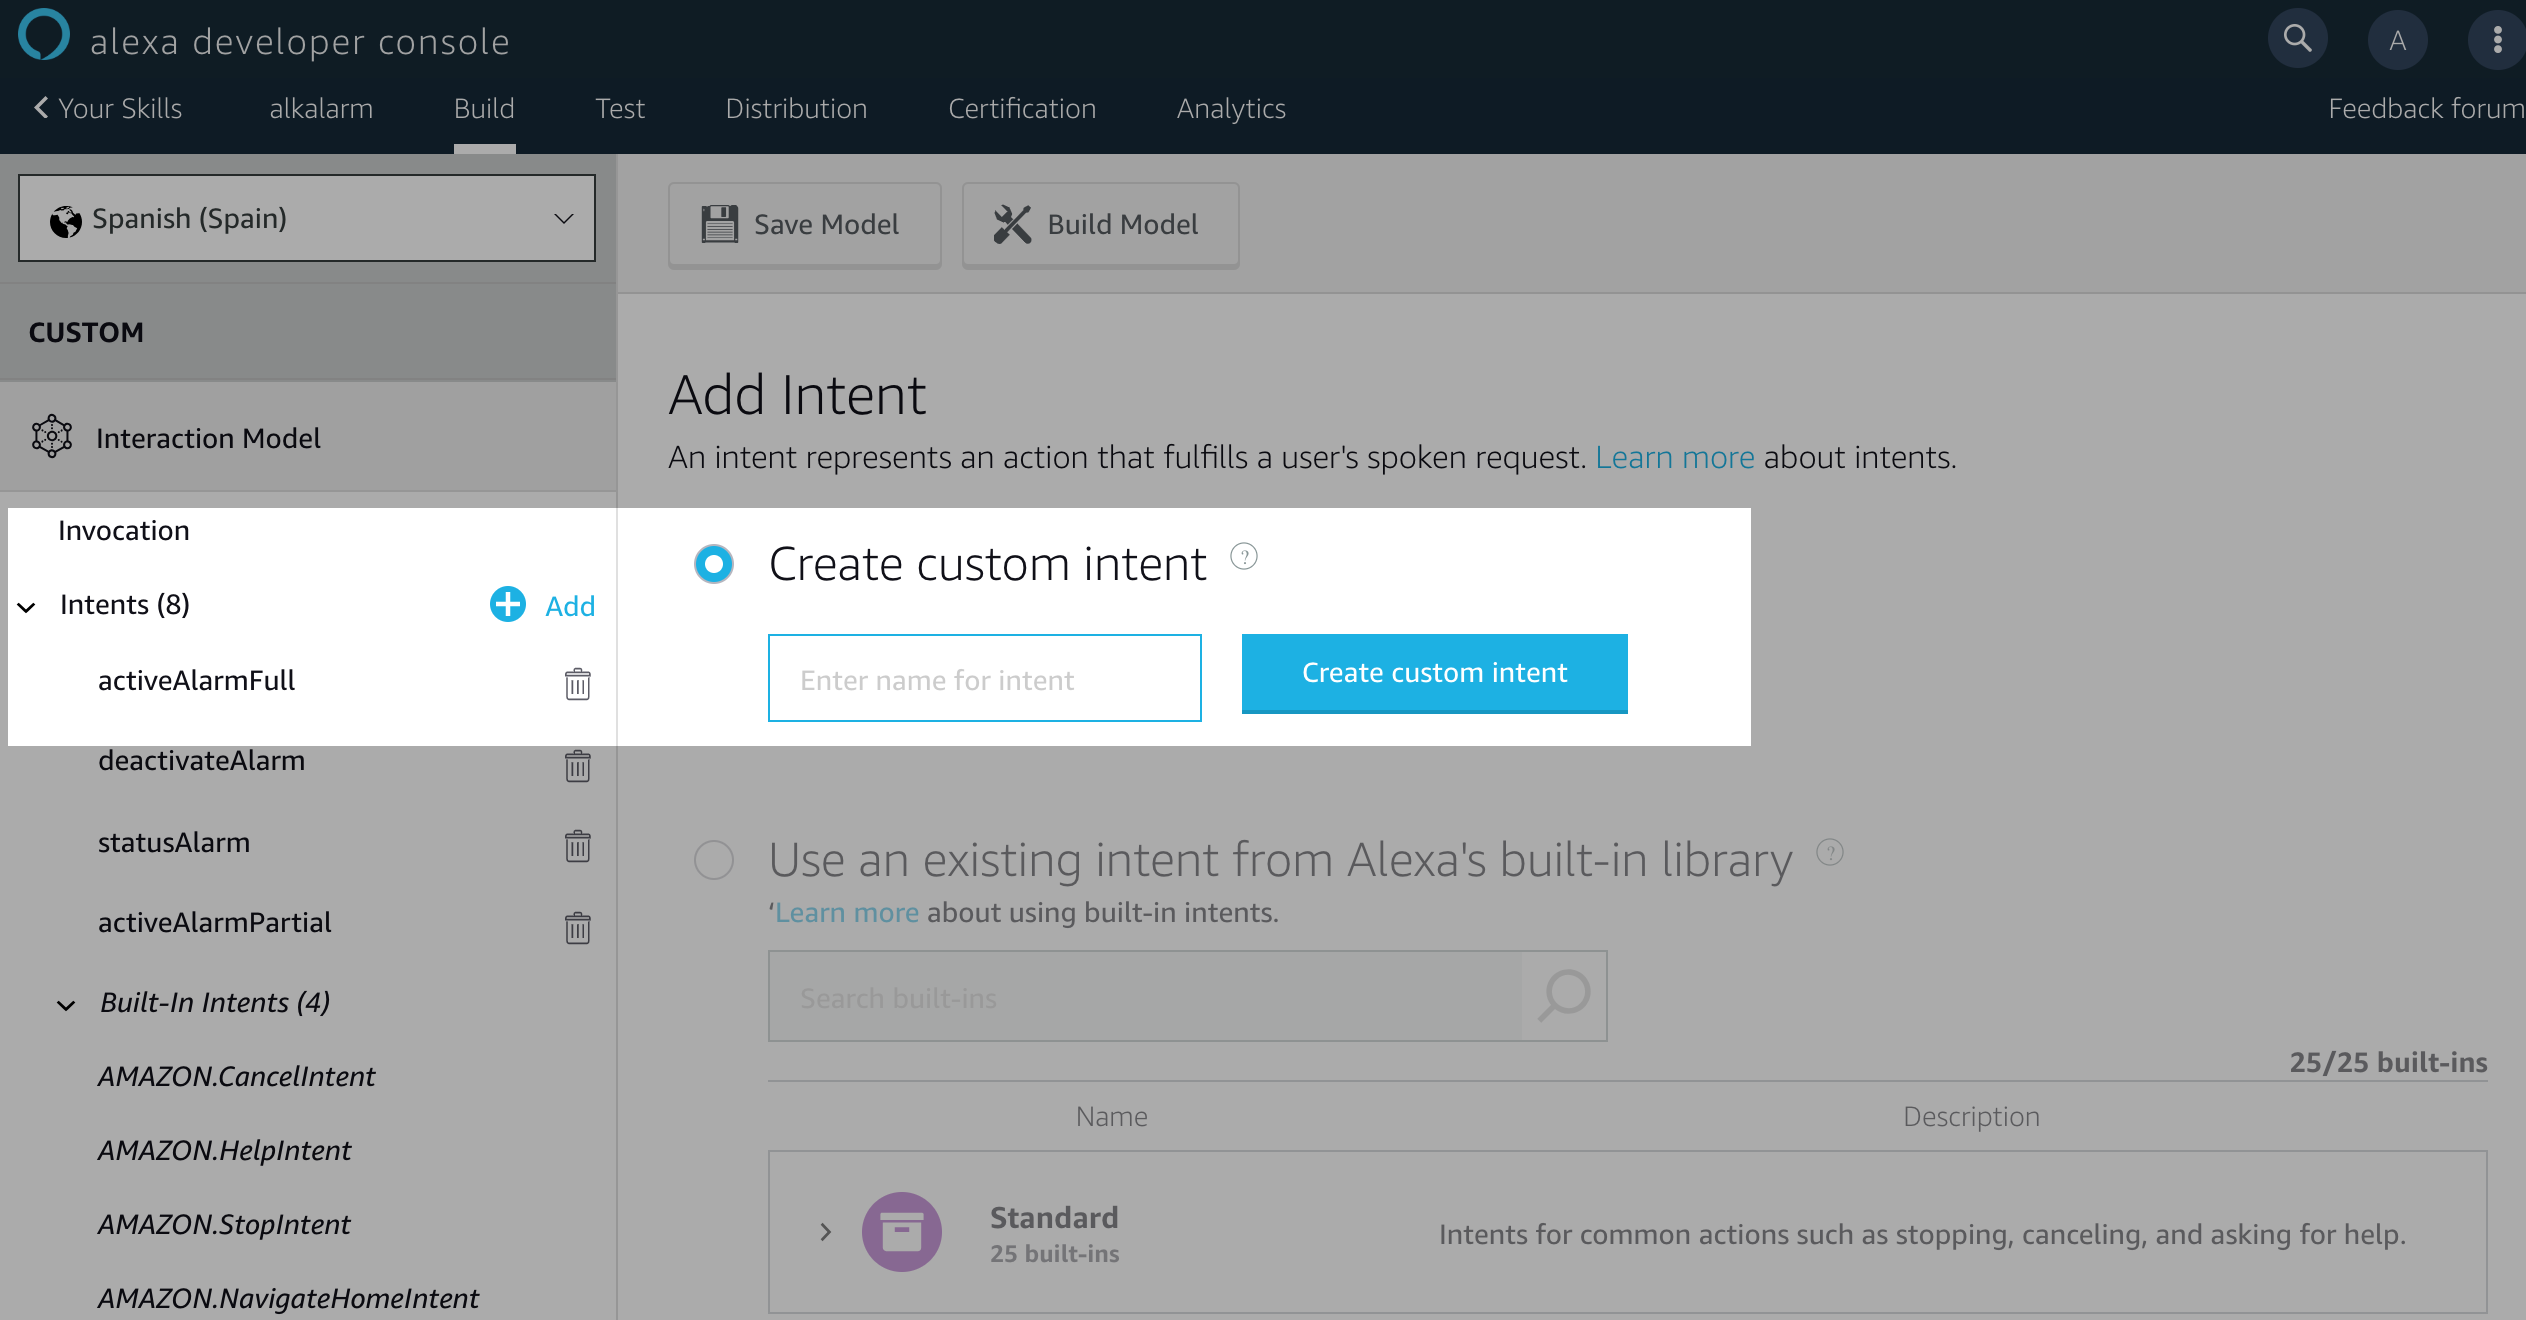
    For the intent, you have to select the name keeping in mind the recommendation done before:

    dev3

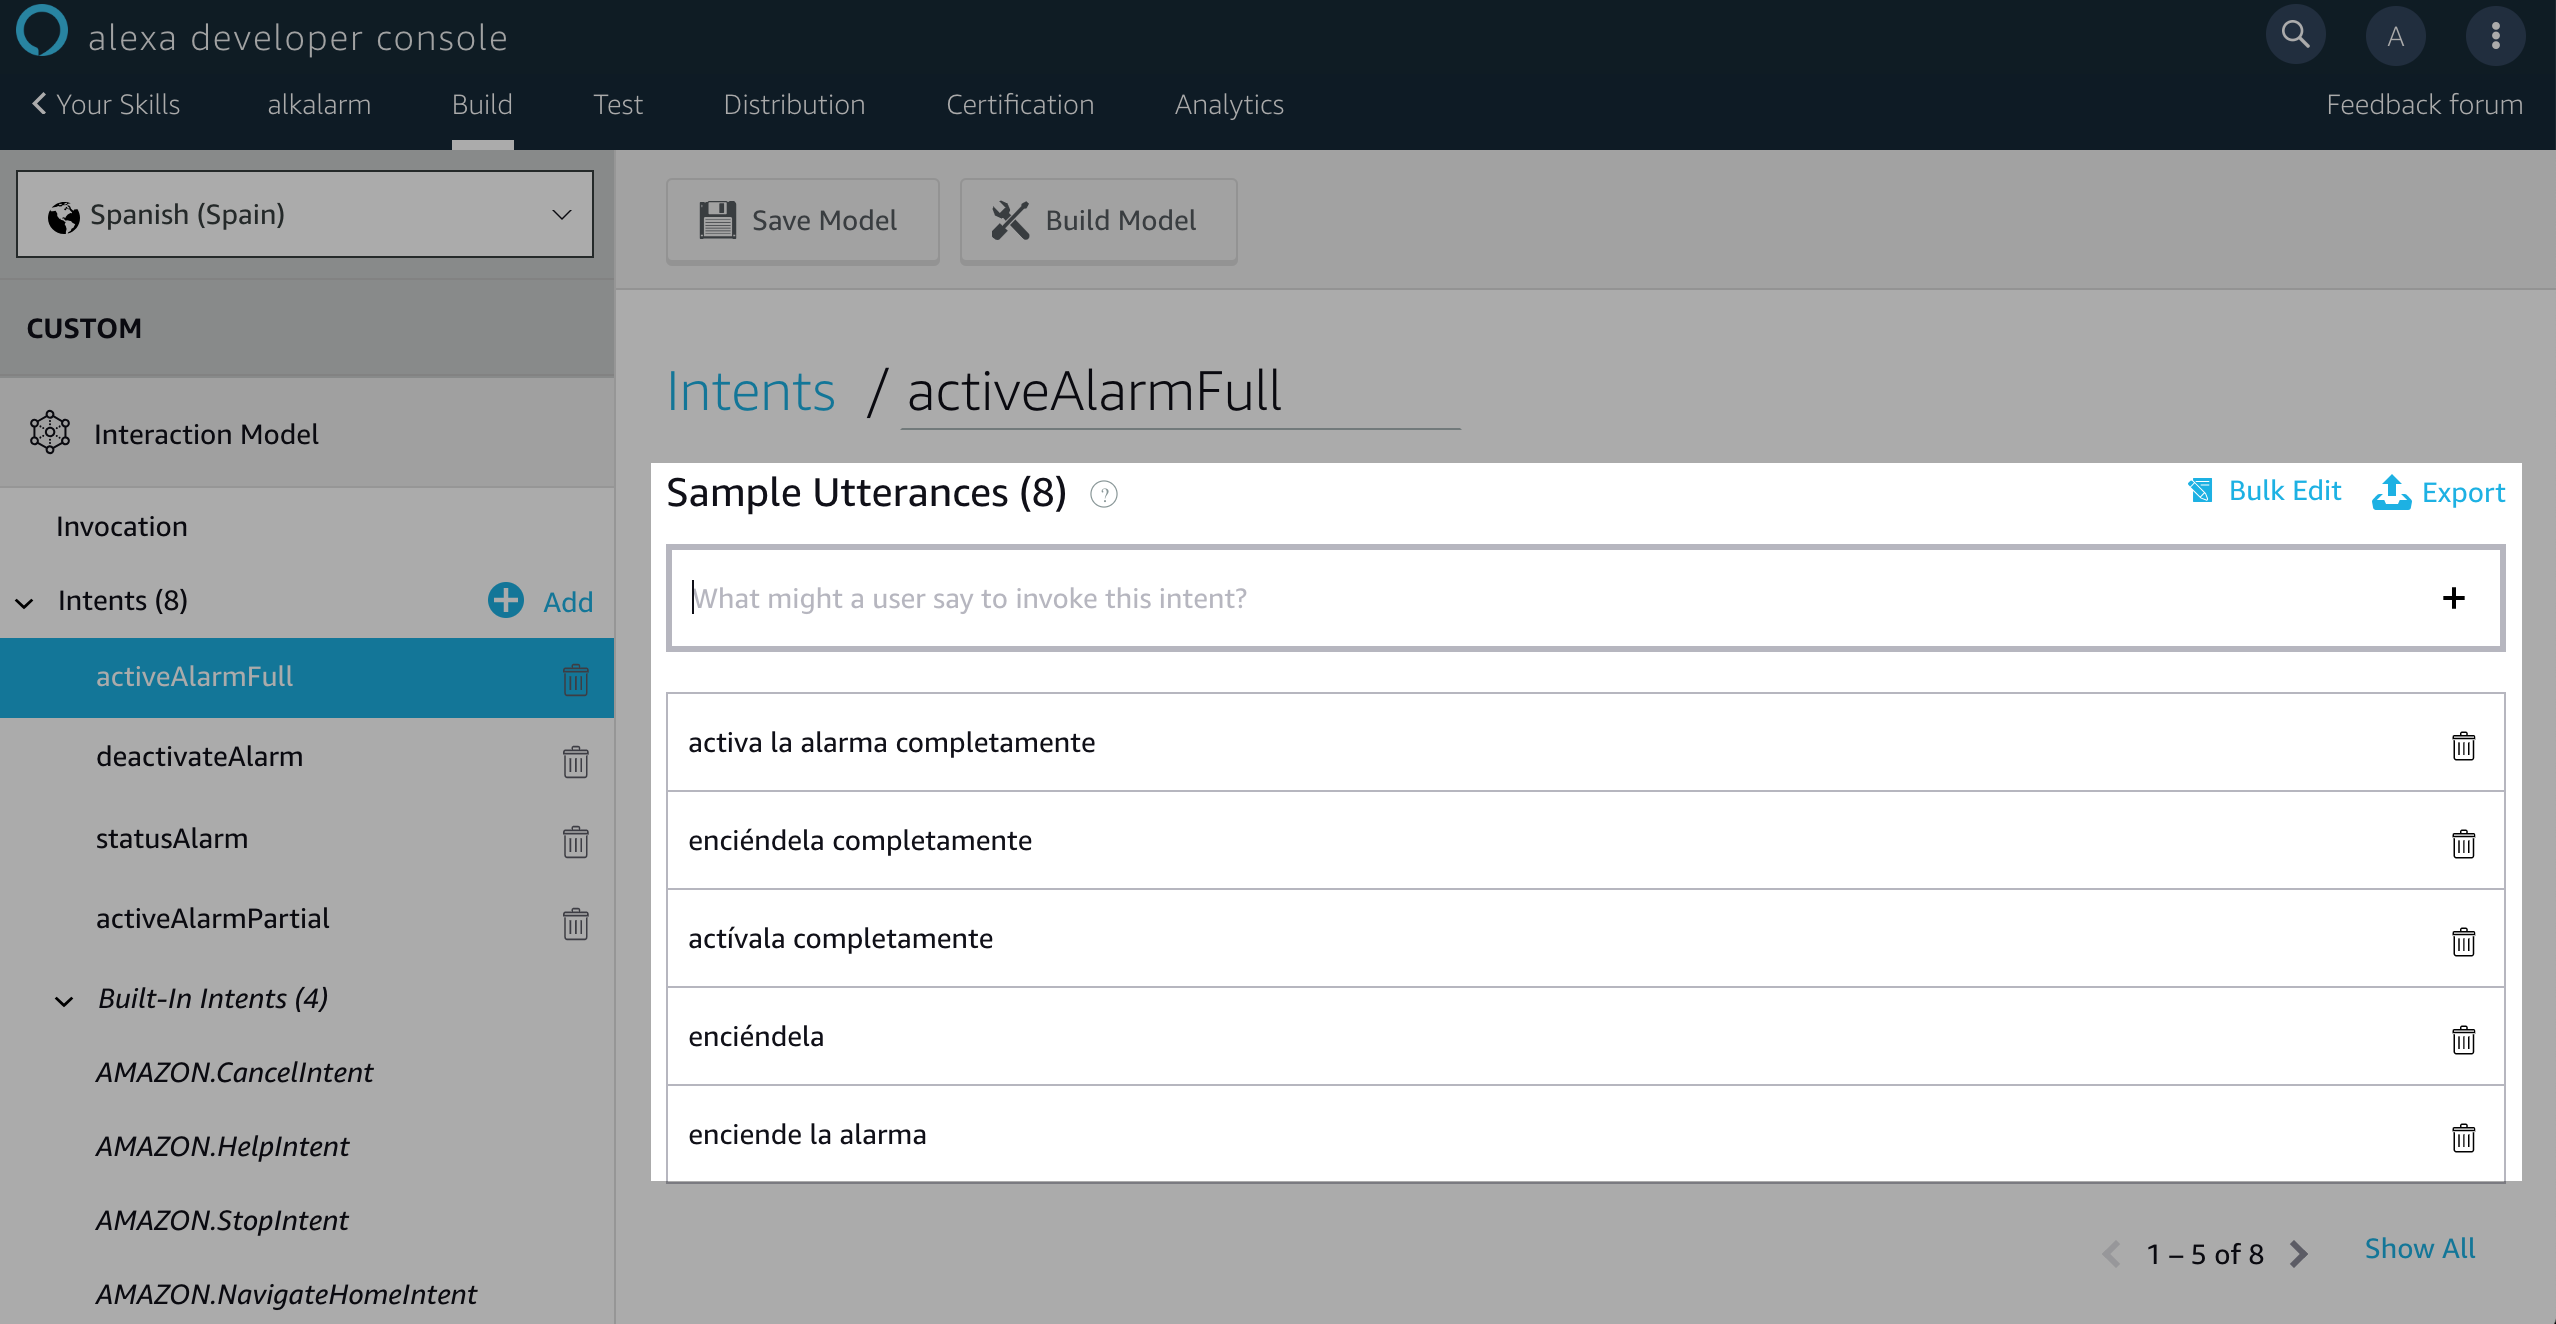
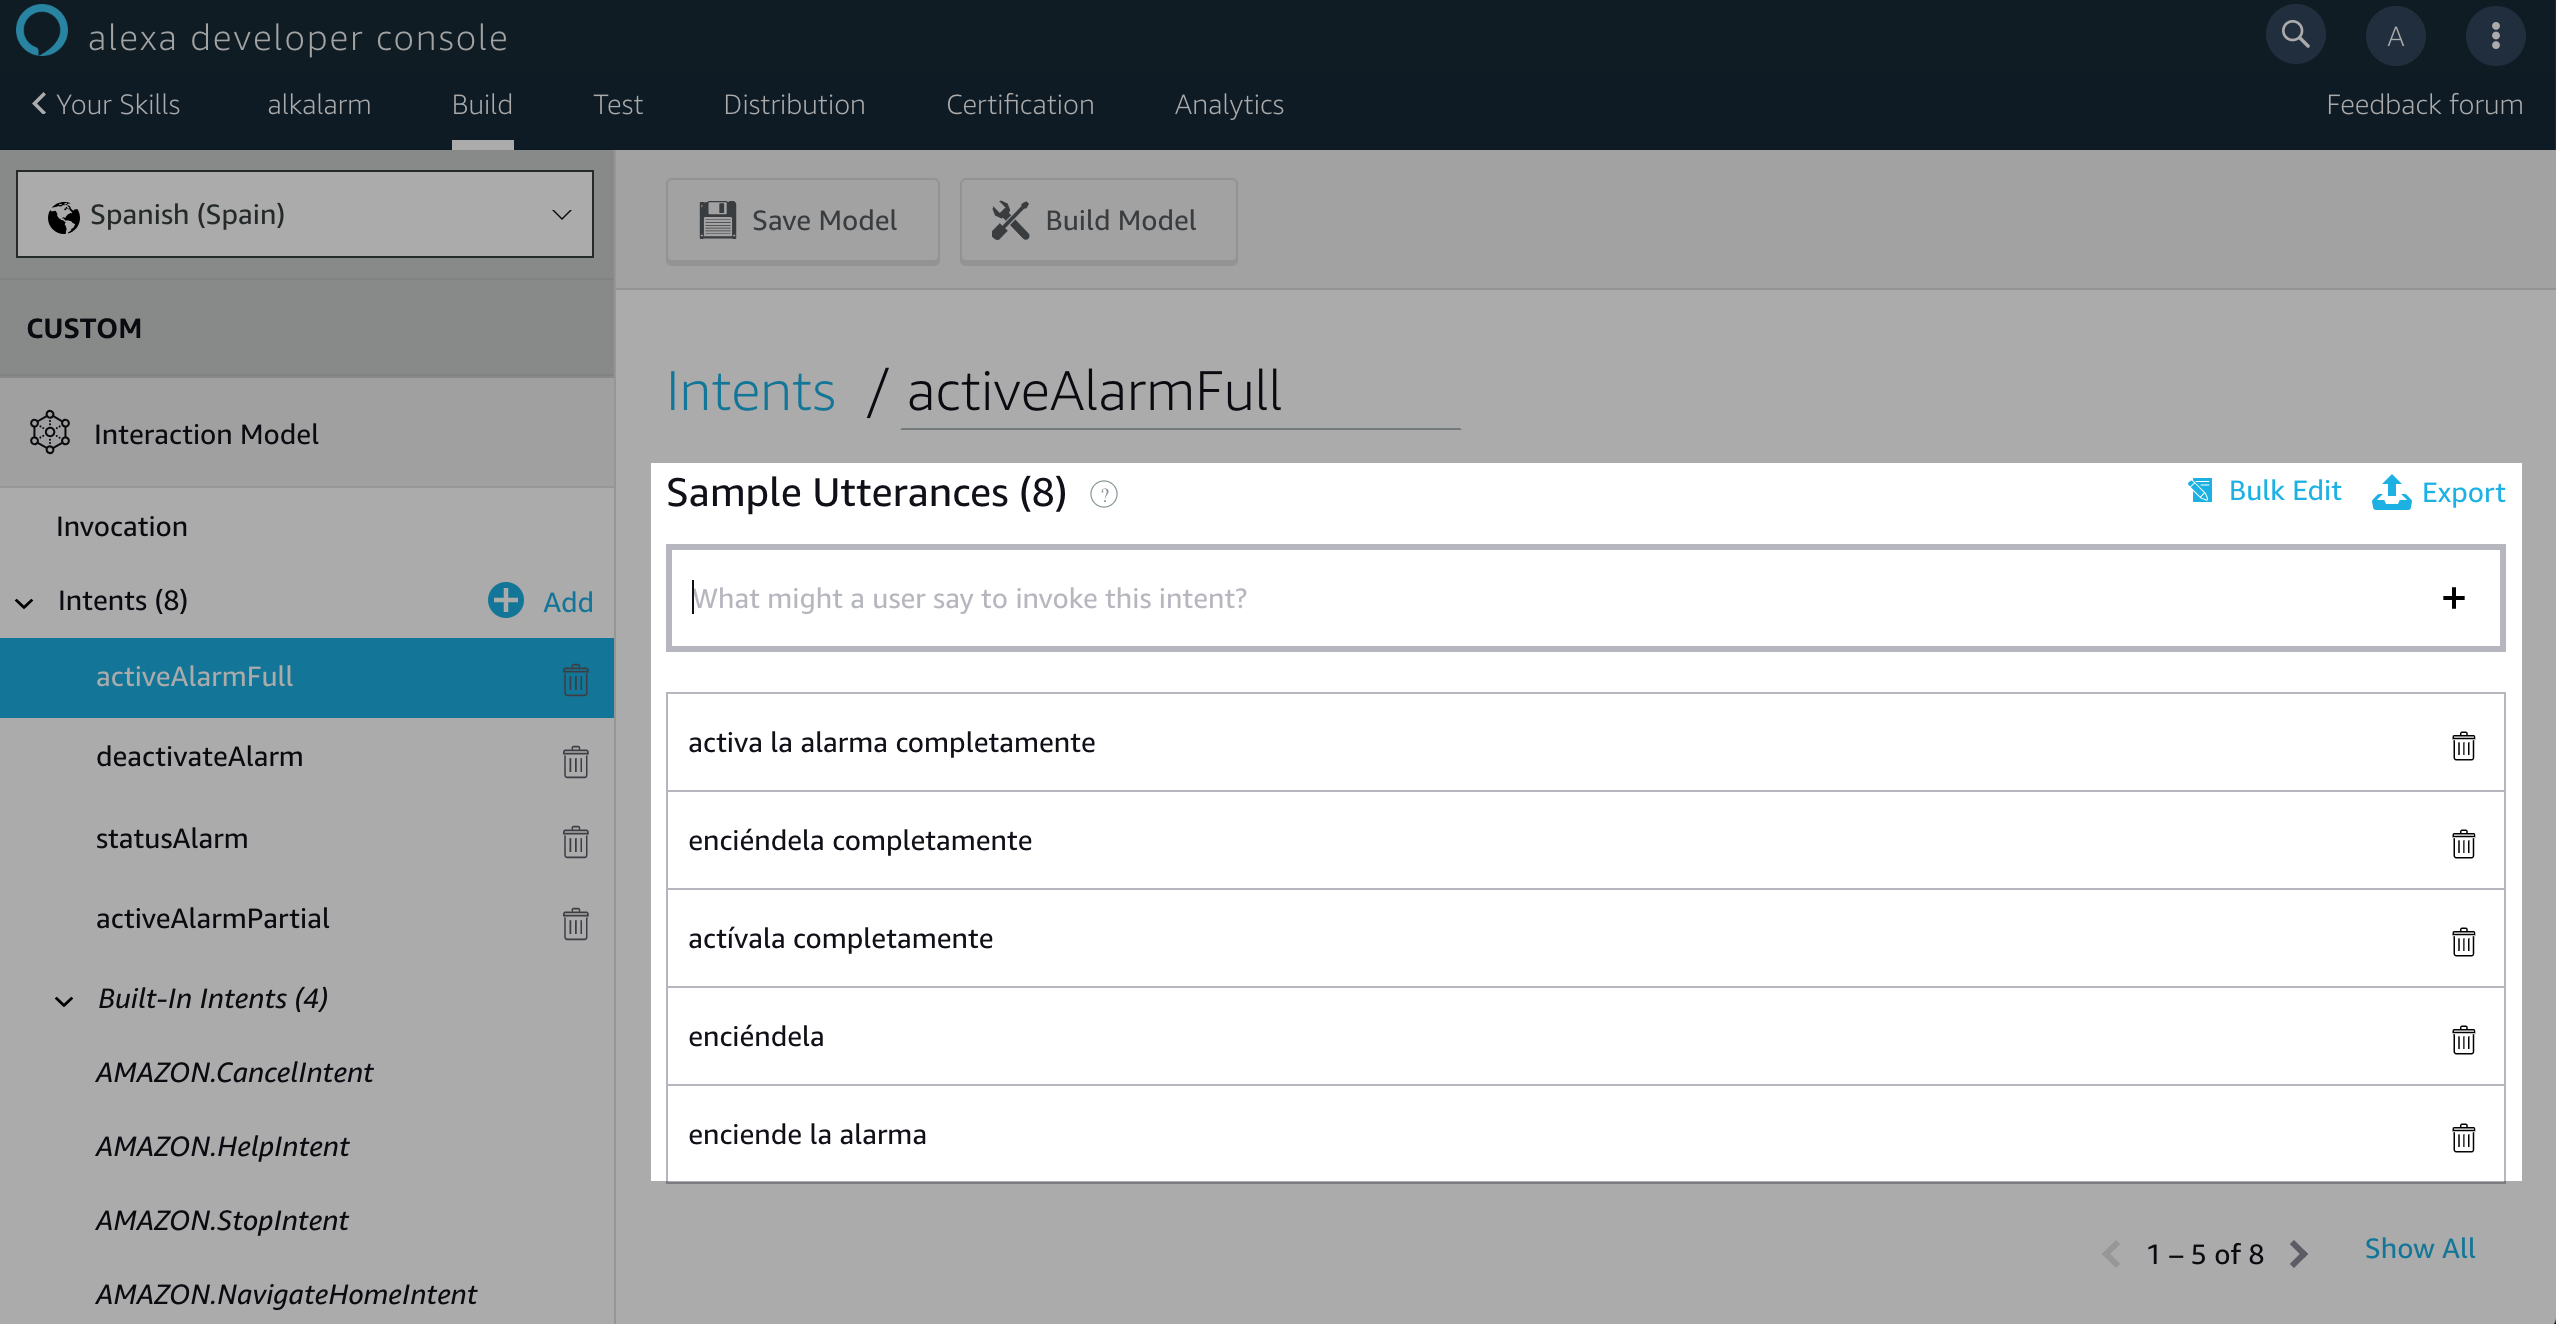
    After that, we have to define the language to interact with alexa:

    dev4

    dev5

    dev6

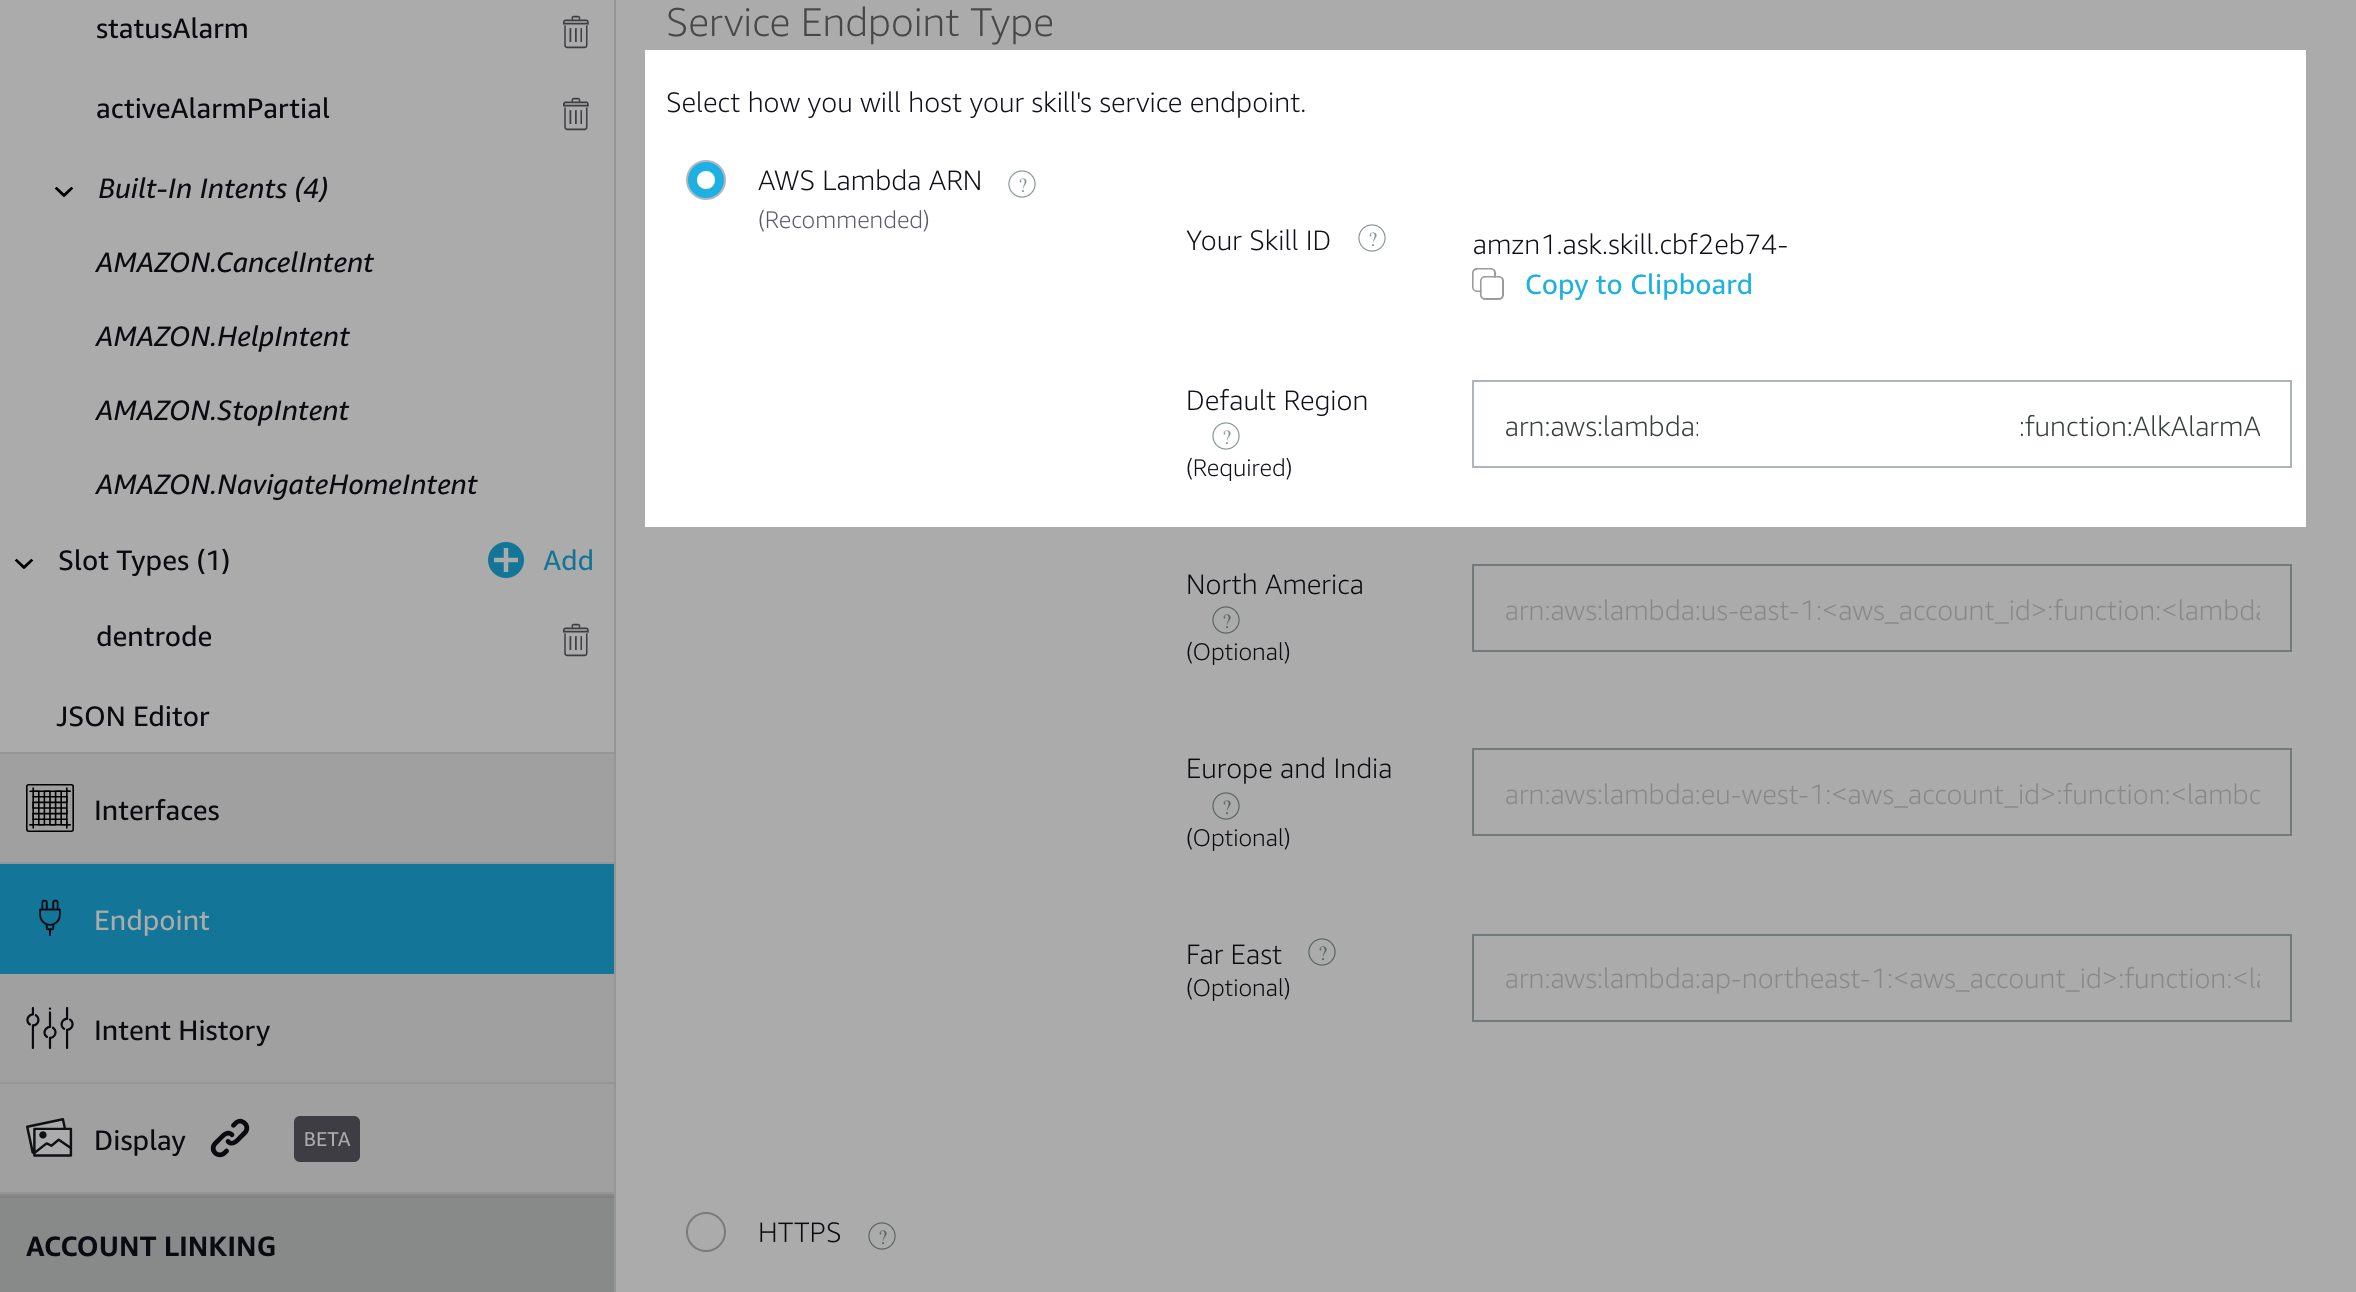
    After we have all the phrases to interact with alexa, we have to define the reference to lambda using the endpoint section: Let’s came back here in the next session (after lambda creation phase)

    dev7

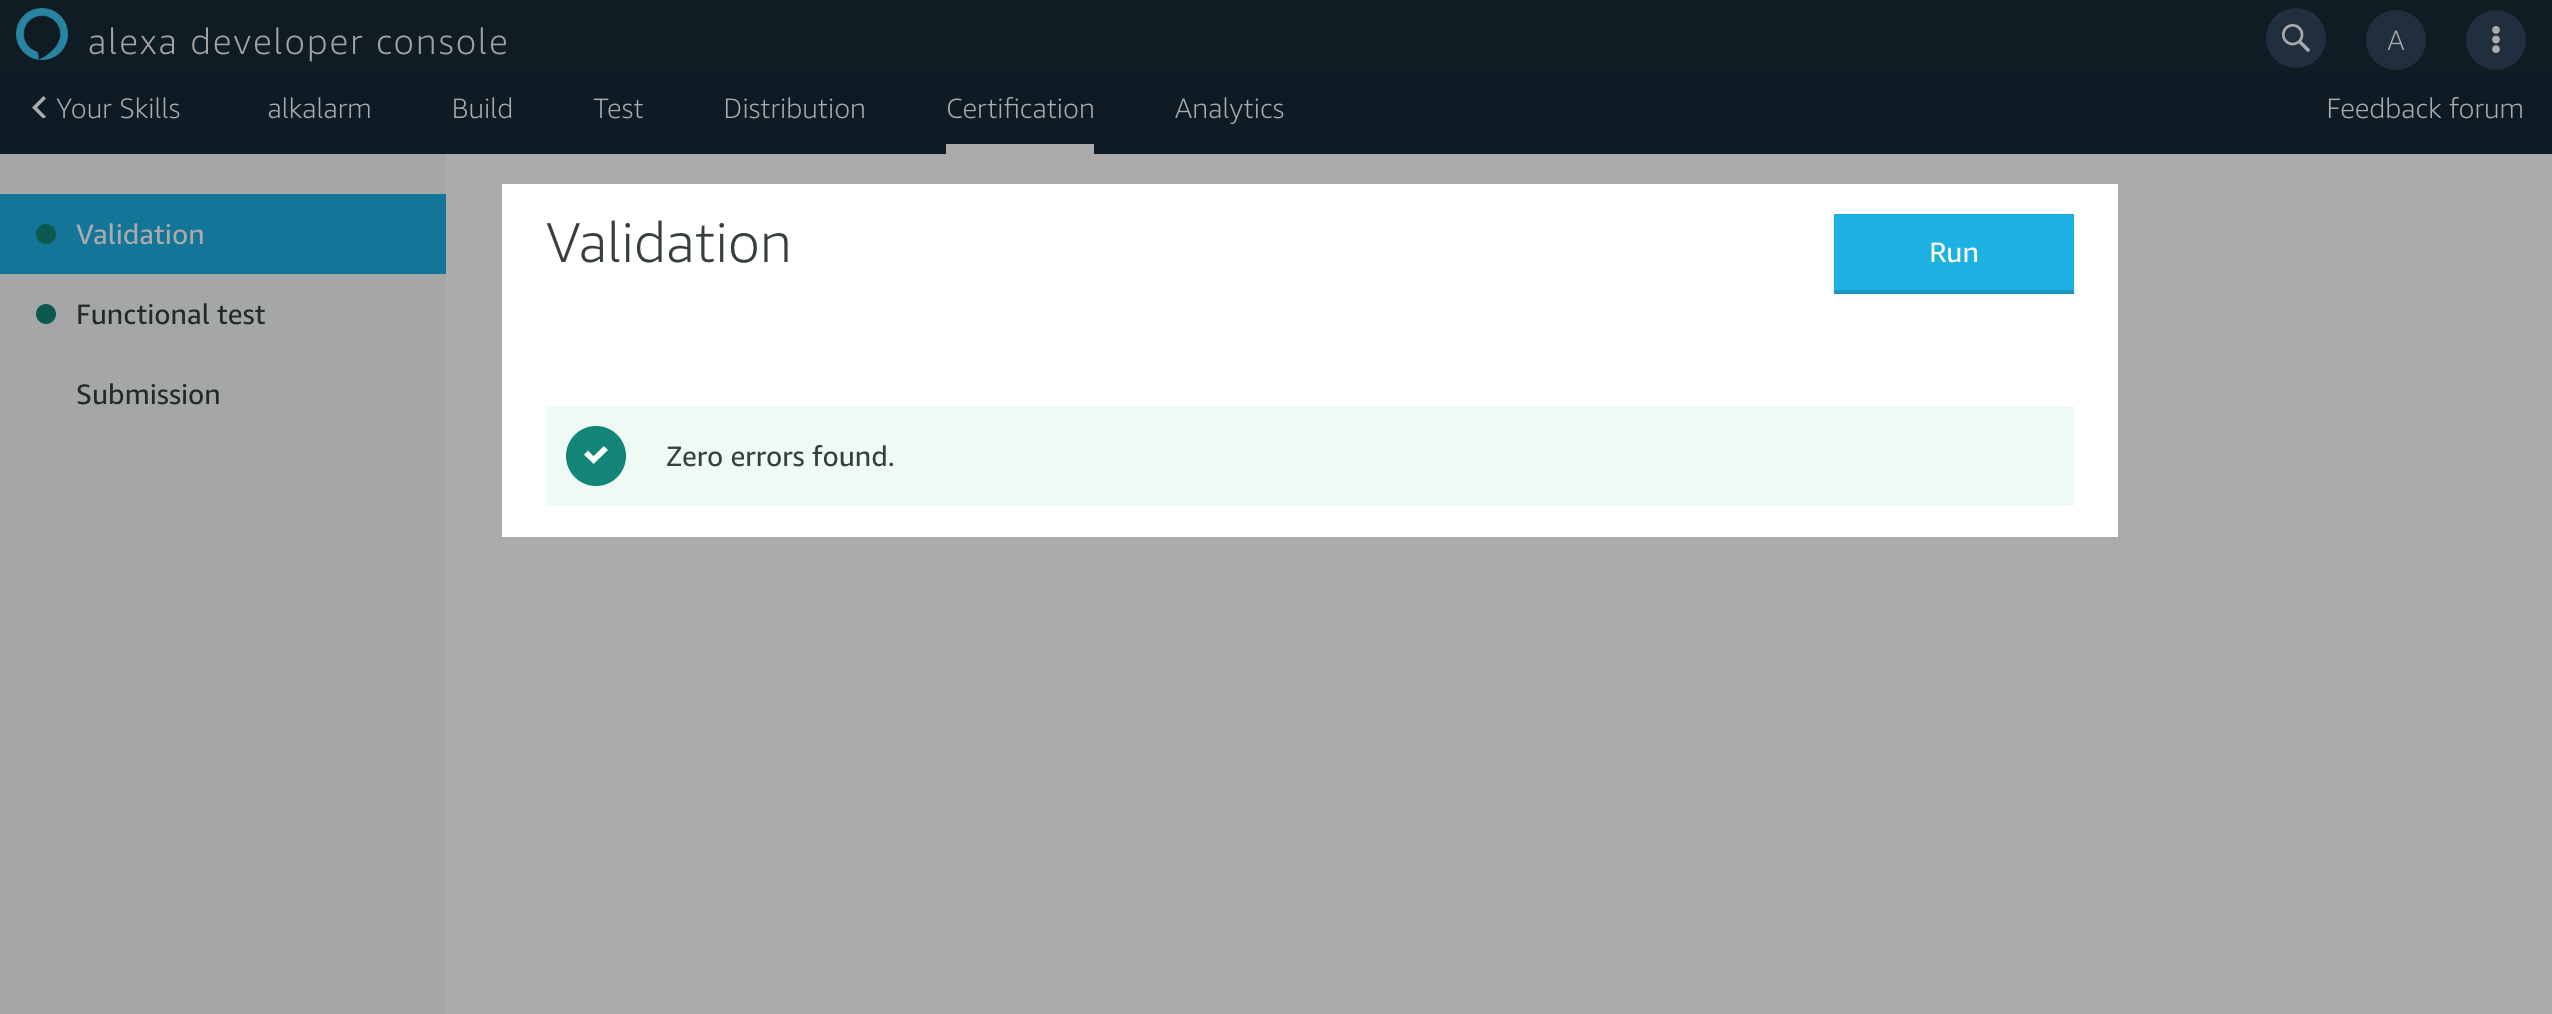
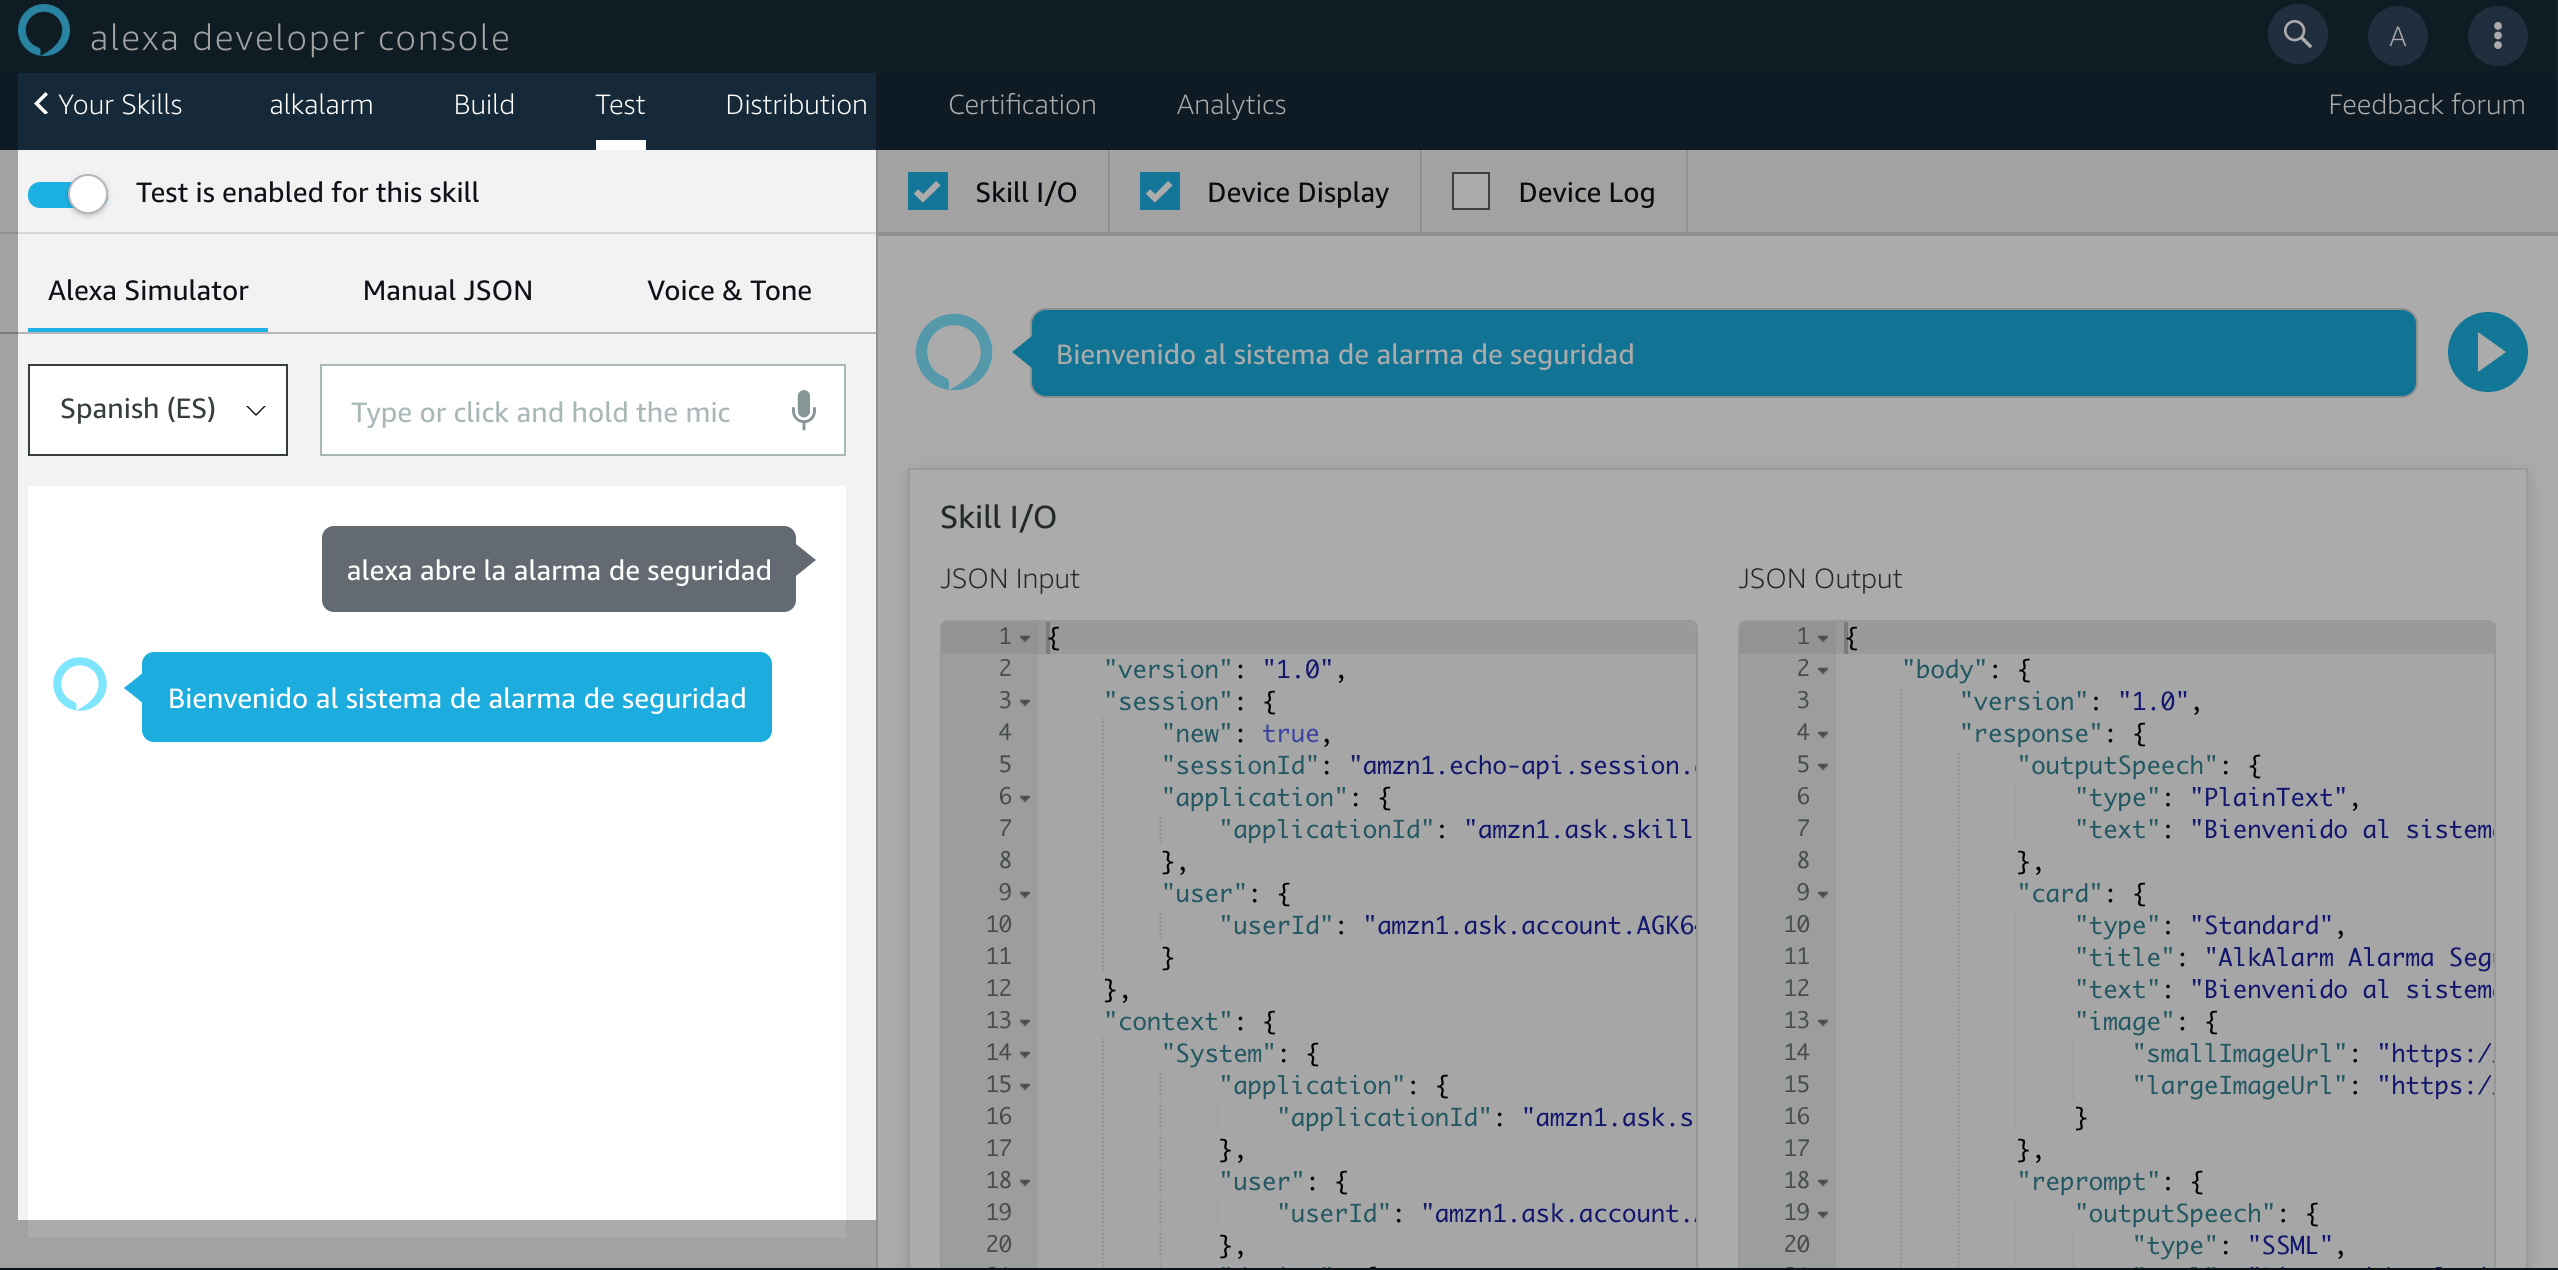
    Wow!!! Right now, we can test the application with the test feature console:

    dev8

    and test if the skill has any error to distribute to the real world 😉

    dev9

    Visit original content creator repository https://github.com/alknopfler/alkalarm-alexa-skills